1 Tablespoon That Revived My Plant Overnight: The Simple Trick Every Home Gardener Should Know
Discover how 1 tablespoon of a simple ingredient revived a struggling plant. Learn the science, method, and safe way to boost plant growth at home.
When Your Plant Looks Like It’s Given Up
You water it.
You move it to better light.
You even talk to it (yes, we’ve all done it).
And still… nothing.
Leaves stay dull. Growth slows. Flowers disappear.
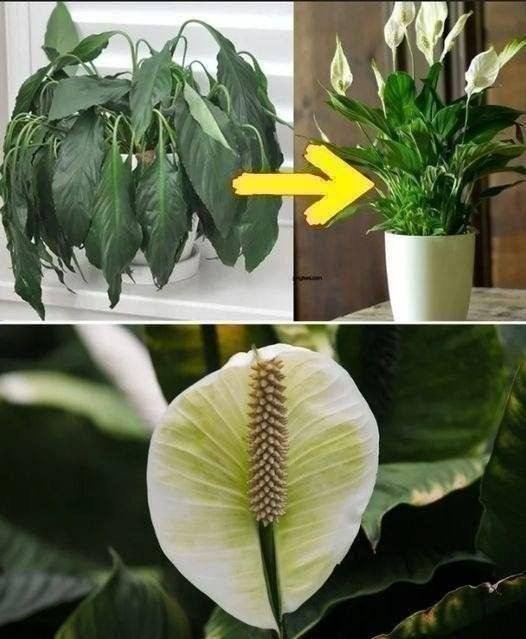
That’s exactly where I was—staring at a plant that looked like it had quietly decided it was done trying.
Then I tried something incredibly simple: just 1 tablespoon of a common household ingredient added directly into the pot.
Within days, the change was obvious.
New growth.
Healthier leaves.
And eventually—blooms again.
Let’s break down what likely happened, why it worked, and how you can use this method safely without harming your plants.
What That “1 Tablespoon” Usually Is (And Why It Works)
In most real-world gardening cases, when someone says “I added 1 tablespoon and my plant came back,” they’re usually referring to one of three things:
1. Epsom Salt (Most Likely)
This is the most common explanation.
What it contains:
- Magnesium
- Sulfur
These are essential nutrients for plant health.
Why it works:
- Magnesium helps plants produce chlorophyll (greener leaves)
- Improves nutrient absorption
- Encourages flowering in certain plants
When a plant is deficient, even a small boost can create a dramatic turnaround.
2. Baking Soda (Less Common for Blooming)
Used occasionally for:
- Fungus control
- Mild pH adjustment
But it doesn’t typically trigger blooming—so it’s less likely your “magic tablespoon.”
3. Hydrogen Peroxide (Diluted)
Used to:
- Improve oxygen in the soil
- Help stressed roots recover
But this is usually mixed with water, not added directly.
Why Such a Small Amount Made a Big Difference
Plants don’t always need more water or sunlight—they often need specific nutrients they’re missing.
Think of it like this:
If your plant has everything except magnesium, adding that one missing piece can unlock:
- Better photosynthesis
- Stronger roots
- Flower production
That’s why a single tablespoon can feel like a miracle.
Step-by-Step: How to Use This Method Safely
If you want to try this yourself, here’s the correct way to do it.
Method 1: Direct Soil Application (Occasional Use)
- Add 1 tablespoon of Epsom salt to the top layer of soil
- Lightly mix it in
- Water thoroughly
✔ Use only once every 3–4 weeks
Method 2: Diluted Liquid Feed (Safer & More Effective)
- Mix 1 tablespoon Epsom salt in 1 gallon of water
- Water your plant as usual
✔ Use every 2–4 weeks during growing season
Real-Life Scenario: Why This Works So Fast
Let’s say your plant:
- Has pale leaves
- Isn’t blooming
- Looks “stuck” in growth
This often points to a magnesium deficiency.
After adding Epsom salt:
- Chlorophyll production improves
- Leaves regain color
- Energy production increases
- Flowers start forming again
The change can happen surprisingly fast—sometimes within a week.
When This Trick Works Best
This method is especially effective for:
- Flowering plants
- Tomatoes and peppers
- Roses
- Indoor houseplants lacking nutrients
When It Might NOT Work
It’s important to be realistic.
This won’t fix:
- Root rot
- Severe overwatering
- Pest infestations
- Poor lighting conditions
If the core problem isn’t nutrient-related, this trick won’t solve it.
Common Mistakes to Avoid
1. Using Too Much
More is NOT better.
Excess magnesium can:
- Block calcium uptake
- Harm plant balance
2. Using It Too Often
Stick to a schedule—don’t apply weekly unless needed.
3. Ignoring the Real Problem
If your plant is dying due to:
- Overwatering
- Lack of sunlight
No supplement will fix that alone.
Expert Tips Most Beginners Miss
- Always water before applying nutrients to avoid root burn
- Test on one plant before applying to all
- Combine with proper sunlight for best results
- Observe changes instead of blindly repeating
2026 Gardening Insight: Why Simple Fixes Are Trending
More home gardeners across the US are shifting toward:
- Minimal, targeted interventions
- DIY plant care solutions
- Low-cost alternatives to commercial fertilizers
And methods like this are gaining popularity because they’re:
- Accessible
- Affordable
- Surprisingly effective
Pros and Cons of the “1 Tablespoon Trick”
Pros
- Quick visible results
- Easy to apply
- Low cost
- Widely available
Cons
- Not a universal solution
- Can be misused easily
- Doesn’t replace balanced fertilization
Frequently Asked Questions
1. Can I use this for all plants?
Most plants tolerate Epsom salt, but always test first.
2. How quickly will I see results?
Usually within a few days to 2 weeks.
3. Is it safe for indoor plants?
Yes, when used in moderation.
4. Can I overuse Epsom salt?
Yes—it can harm soil balance over time.
5. Does it replace fertilizer?
No—it’s a supplement, not a complete nutrient source.
6. What plants benefit most?
Flowering and fruiting plants respond best.
7. Can I mix it with other fertilizers?
Yes, but avoid overfeeding.
8. Should I apply it to dry soil?
No—always water first.
Quick Action Checklist
- ✔ Identify if your plant shows nutrient deficiency
- ✔ Use 1 tablespoon Epsom salt (not more)
- ✔ Apply once every few weeks
- ✔ Monitor plant response
- ✔ Adjust care routine as needed
Final Thoughts: Small Changes, Big Results
Sometimes, plant care isn’t about doing more—it’s about doing the right thing at the right time.
That one tablespoon didn’t magically revive your plant.
It simply gave it what it was missing.
And that’s the real lesson.
A simple, targeted fix like adding 1 tablespoon of the right nutrient can dramatically improve plant health—but only when used thoughtfully.
If you’ve tried this trick, what plant did it work on?
And did you notice changes right away—or over time?
Share your experience—because sometimes the simplest tips are the ones that help the most. 🌿