2-Ingredient Peanut Butter Fudge: Rich, Creamy, and Ready in Minutes
Imagine biting into a piece of fudge so smooth it melts on your tongue, with the nutty, creamy flavor of peanut butter taking center stage. No long cooking times, no complicated steps—just two ingredients, a little patience in the fridge, and pure sweet satisfaction. This is the magic of 2-Ingredient Peanut Butter Fudge, a dessert that’s perfect for busy weekdays, last-minute gifts, or a quick indulgence.
The first time I made this, I remember sneaking a piece straight from the pan. The creamy texture and rich peanut butter flavor made me feel like I’d stepped into a candy shop, all without leaving my kitchen. It’s comfort food, nostalgia, and decadence all in one tiny square.
Why You’ll Love This Recipe
-
Ultra-simple: Only 2 ingredients!
-
No baking required: Ready in under 10 minutes.
-
Kid-friendly: Sweet, creamy, and fun to make.
-
Customizable: Add chocolate chips, sea salt, or nuts for extra flair.
-
Perfect for gifts: Slice into squares, wrap, and share.
-
Budget-friendly: Uses pantry staples.
Ingredients (Makes about 16 small squares)
-
1 cup (250g) creamy peanut butter (unsweetened or sweetened)
-
1 can (14 oz / 397g) sweetened condensed milk
Optional Add-Ins:
-
1/2 tsp vanilla extract for extra depth
-
1/4 cup chocolate chips or drizzle
-
Pinch of sea salt for salted peanut butter fudge
-
Chopped nuts for texture
Healthy Substitutes:
-
Use natural peanut butter (smooth, no added sugar)
-
Use reduced-sugar or sugar-free condensed milk for lighter version
Kitchen Tools Needed
-
Medium saucepan
-
Wooden spoon or silicone spatula
-
8×8-inch baking pan
-
Parchment paper
-
Knife for slicing
Step-by-Step Preparation
1. Prep the Pan
-
Line an 8×8-inch baking pan with parchment paper for easy removal.
2. Heat Ingredients
-
In a medium saucepan, combine 1 cup peanut butter with 1 can sweetened condensed milk.
-
Heat over low to medium heat, stirring constantly to prevent burning.
3. Combine & Stir
-
Stir until smooth, creamy, and fully combined (about 2–3 minutes).
-
Optional: Add vanilla extract, chocolate chips, or a pinch of sea salt.
4. Pour & Set
-
Pour the mixture into the prepared pan, spreading evenly.
-
Smooth the top with a spatula.
5. Chill
-
Refrigerate for at least 2 hours until firm.
-
Slice into squares and serve.
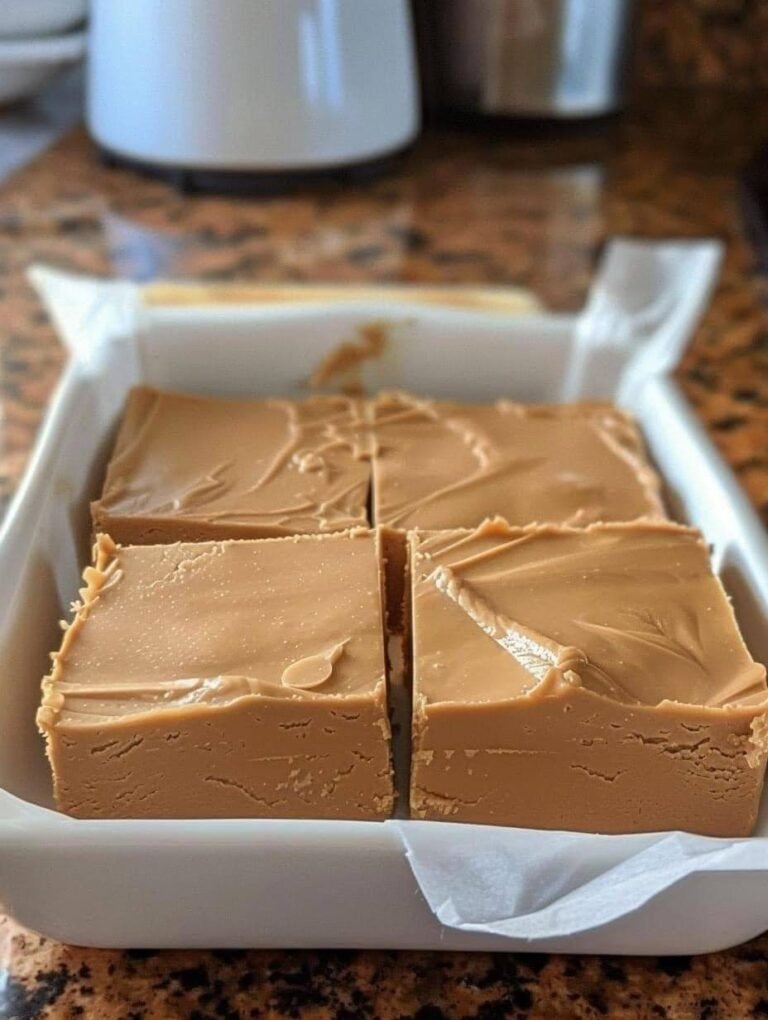
Texture Cue: Fudge should be firm enough to hold shape but soft enough to melt in your mouth.
Expert Tips & Mistakes to Avoid
-
Low heat is key: High heat can separate peanut butter and condensed milk.
-
Stir constantly: Prevents burning and ensures creamy texture.
-
Line the pan: Makes it easy to lift fudge without sticking.
-
Slice cold: Fudge is easier to cut once fully chilled.
Variations & Customizations
-
Chocolate Peanut Butter Fudge: Add 1/2 cup cocoa powder while stirring.
-
Nutty Fudge: Mix in chopped peanuts, almonds, or cashews.
-
Salted Fudge: Sprinkle flaky sea salt on top before refrigerating.
-
Layered Fudge: Spread chocolate layer first, chill, then add peanut butter layer.
Storage & Reheating Instructions
-
Fridge: Store in airtight container for up to 2 weeks.
-
Freezer: Wrap in parchment or foil; lasts up to 3 months.
-
Serving Tip: Let sit at room temperature for 5 minutes before eating for creamy texture.
Serving Suggestions
-
Enjoy as bite-sized treats with coffee or tea.
-
Serve at parties or holiday gatherings for a quick dessert.
-
Use as a topping for ice cream, pancakes, or brownies.
FAQs
1. Can I use crunchy peanut butter?
Yes! Adds texture and a nutty crunch to your fudge.
2. Can I make this vegan?
Use sweetened condensed coconut milk and a vegan peanut butter.
3. Why did my fudge crack or separate?
Likely overheated—cook on low heat and stir constantly.
4. Can I make it in mini muffin tins?
Yes! Great for individual bites; reduce chilling time slightly.
5. Can I add chocolate?
Absolutely—either mix cocoa powder into the fudge or swirl melted chocolate on top.
2-Ingredient Peanut Butter Fudge proves that simple can be spectacular. It’s creamy, sweet, and delightfully indulgent—all with just two ingredients. Try it today, slice up a few squares, and share with family and friends. Don’t forget to comment with your favorite twist or add-ins—let’s make the easiest fudge the most delicious treat in your kitchen!