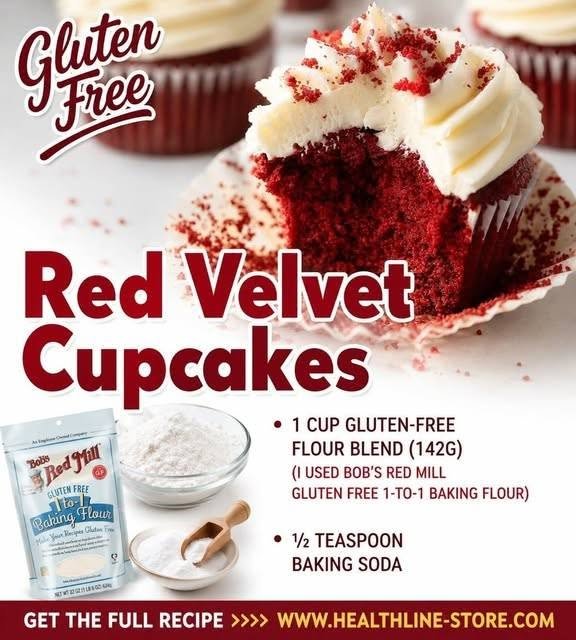
The Ultimate Gluten-Free Red Velvet Cupcakes Recipe That Actually Tastes Like Bakery Style
Bake bakery-quality gluten-free red velvet cupcakes with a tender crumb and rich cocoa flavor. No weird aftertastes or dry textures. Get the recipe!
There is a very specific kind of heartbreak that comes with biting into a gluten-free pastry and feeling like you are chewing on flavored cardboard. For years, the gluten-free baking community has accepted a tragic compromise: if you want to avoid gluten, you must also agree to forfeit moisture, structural integrity, and joy. You get cupcakes that crumble into a sad pile of sand the second the paper liner is peeled away, or dense little hockey pucks that require an entire glass of milk just to swallow.
Red velvet is particularly unforgiving in this arena. It is a flavor profile built on a delicate balance—a whisper of cocoa, a distinct tang from buttermilk, and a vibrant crimson hue that demands a velvet-soft crumb. When you strip away the wheat protein, that delicate balance collapses unless you approach the formulation like a food scientist rather than a casual home baker.
If you have ever pulled a batch of gluten-free cupcakes from the oven only to watch them sink in the middle like tired soufflés, or if you are tired of spending twenty dollars on specialty flours that yield disappointing results, you are in the exact right place. This is not just a conversion of a standard box mix; this is a masterclass in building texture, locking in moisture, and achieving that iconic bakery-style dome without a single gram of gluten.
Understanding the Anatomy of True Red Velvet
True red velvet is not merely chocolate cake dyed red. That is one of the most persistent culinary myths floating around modern food blogs. Historically, the reddish hue of a velvet cake came from a chemical reaction between raw, non-alkalized cocoa powder and acidic ingredients like buttermilk and vinegar. When that acid hit the anthocyanin in the cocoa, it turned a deep mahogany or reddish-brown.
Modern baking relies heavily on Dutch-process cocoa, which has been neutralized, meaning it loses that natural color-changing magic. Hence, the food coloring enters the chat. But the soul of the cake remains rooted in its chemistry.
When you remove all-purpose flour from this equation, you lose the gluten network that traps carbon dioxide bubbles produced by baking soda and vinegar. Without that elastic matrix, gluten-free baked goods struggle to rise evenly and often turn out gummy or crumbly. To solve this, we have to engineer a custom flour blend, harness the power of specific binding agents like xanthan gum, and respect the precise temperature of our dairy.
Why Getting Gluten-Free Red Velvet Right Actually Matters
In the American culinary landscape, dietary restrictions are no longer niche; they are a standard consideration at every birthday party, holiday gathering, and office celebration. Yet, gluten-free options are frequently treated as an afterthought—dry cupcakes relegated to the end of the dessert table, frosted with overly sweet canned icing designed to mask the misery underneath.
Ignoring the technical nuances of gluten-free baking leads to predictable culinary failures:
-
The Gritty Aftertaste: Using cheap rice flours without proper milling or resting time leaves a distinct, unpleasant texture on the tongue.
-
Structural Collapse: Without adequate binders or protein structure, cupcakes bake up with massive domes that deflate into craters five minutes after leaving the oven.
-
Staling Speed: Gluten-free treats dry out at an alarming rate, turning from edible to bullet-hard within twelve hours if not properly hydrated with fats and sugars.
Mastering this recipe changes the dynamic entirely. When you serve a gluten-free red velvet cupcake that is indistinguishable from its wheat-based counterpart, you bridge the gap between dietary necessity and pure culinary indulgence.
The Essential Ingredients for Bakery-Quality Results
Precision is the secret language of professional baking. While rustic cooking welcomes a handful of this and a splash of that, gluten-free pastry rewards exact measurements.
-
The Flour Blend: A high-quality 1-to-1 gluten-free baking flour containing xanthan gum is mandatory. Brands like Bob’s Red Mill (Blue Label) or King Arthur Measure for Measure provide the necessary starch-to-grain ratio without requiring you to mix ten different bags of flour yourself.
-
The Cocoa Powder: Stick to natural, non-alkalized cocoa powder (like Hershey’s regular unsweetened). Dutch-process cocoa lacks the acidity required to jumpstart the chemical rise with baking soda.
-
The Fat Matrix: Combining unsalted butter for rich flavor with a neutral oil like canola or grapeseed ensures the cupcakes stay moist for days. Oil liquidifies at room temperature, which tricks the palate into perceiving a more tender crumb.
-
The Dairy & Acid: Full-fat buttermilk is non-negotiable. Its acidity tenderizes the gluten-free starches and activates the baking soda for a gorgeous, velvety lift.
-
The Color: Skip the watery grocery store food coloring drops. Use a high-concentration gel food coloring (such as Americolor Red Red or Super Red) to achieve that iconic vibrancy without diluting your batter with excess liquid.
Step-by-Step Actionable Baking Guide
Treat this workflow like a laboratory procedure. Every step serves a mechanical purpose in developing texture and flavor.
-
Prep and Temper: Preheat your oven to 350°F (175°C) and line a standard 12-cup muffin tin with paper liners. Ensure your eggs, butter, and buttermilk are at exact room temperature (around 70°F). Cold ingredients cause the butter to seize, creating a dense, uneven batter.
-
Whisk the Dry Foundation: In a medium bowl, whisk together 1 ½ cups of gluten-free 1-to-1 baking flour, 2 tablespoons of natural cocoa powder, 1 teaspoon of baking soda, and ½ teaspoon of salt. Ensure there are no lumps in the cocoa powder by passing it through a fine-mesh sieve if necessary.
-
Cream the Fat and Sugar: In a stand mixer fitted with the paddle attachment, beat ½ cup of softened unsalted butter and 1 cup of granulated white sugar on medium speed for a full 3 minutes until pale and fluffy. This incorporates microscopic air pockets that expand in the oven.
-
Integrate Wet Components: Add 2 large eggs one at a time, mixing well after each addition. Pour in 1 teaspoon of pure vanilla extract and 1 tablespoon of liquid red gel food coloring. Scrape down the sides of the bowl to ensure even color distribution.
-
Alternate Wet and Dry: Turn the mixer to low. Alternate adding the dry flour mixture in three parts, interspersed with 1 cup of buttermilk in two parts. Begin and end with the flour. Mix only until combined—do not overmix, or you will activate excess starches into a gummy texture.
-
The Acid Finish: In a small cup, mix 1 teaspoon of apple cider vinegar with 1 teaspoon of baking soda. It will fizz violently. Immediately fold this fizzing mixture into the batter with a rubber spatula. This final burst of carbon dioxide creates an airy, delicate crumb.
-
Bake to Precision: Divide the batter evenly among the 12 muffin cups, filling them about two-thirds full. Bake for 18 to 21 minutes. A toothpick inserted into the center should come out clean or with a few moist crumbs attached. Do not overbake, or the gluten-free crumb will dry out instantly.
-
Cooling Protocol: Let the cupcakes rest in the pan for 5 minutes, then transfer them immediately to a wire rack to cool completely before frosting. Trapping them in the hot pan will steam the bottoms and make them soggy.
Real-World Application: The Party Test
Imagine hosting a birthday party where half of your guests have celiac disease or gluten sensitivities, and the other half are vocal skeptics of “health food.” If you serve dry, crumbly cupcakes, the gluten-eaters will politely take two bites and leave the rest on a napkin, while your gluten-free guests will force a smile and pretend it tastes wonderful out of sheer politeness.
When you bring these cupcakes to that same party, the dynamic shifts entirely. Because the crumb is suspended in a delicate balance of oil, butter, and buttermilk, nobody can tell the difference. Kids grab them for the bright red color and cream cheese frosting, and adults ask for the recipe before the candles are even blown out. That is the ultimate benchmark of success in gluten-free baking: when it transcends its dietary restriction and stands purely on its culinary merit.
Implementation Strategies for Success
-
Weigh Your Ingredients: If you own a digital kitchen scale, weigh your gluten-free flour (approx. 120g per cup). Scooping flour with a measuring cup packs it down, resulting in dry, heavy cupcakes.
-
The Rest Period: If you have an extra 15 minutes, let your mixed batter rest on the counter for 10 minutes before scooping it into the pan. This allows the gluten-free starches to fully hydrate in the liquid, smoothing out any potential grittiness.
-
Frosting Stability: Red velvet demands a tangy cream cheese frosting. Ensure your cream cheese is full-fat block style (not tub spread) and beat it with room-temperature butter and powdered sugar. If the frosting feels too soft, chill it for 20 minutes before piping.
Gluten-Free vs. Traditional Red Velvet Cupcakes
| Feature | Traditional Wheat-Based | This Gluten-Free Formulation |
| Structure Source | Gluten protein network | Starch-gum-protein matrix (Xanthan gum + 1:1 flour) |
| Moisture Retention | Moderate (dries out quickly) | High (extended by oil-butter hybrid fat ratio) |
| Crumb Texture | Velodirect and springy | Tender, fine-grained, melt-in-the-mouth |
| Leavening Action | Baking soda + buttermilk + vinegar | Enhanced micro-aeration via active acid-base fizz |
| Palate Perception | Standard bakery standard | Indistinguishable from wheat counterpart |
Common Mistakes and How to Fix Them
-
Mistake: Cupcakes sink drastically in the center right after baking.
-
Fix: Your oven temperature may be too high, causing the edges to set before the center rises, or your baking soda/powder is expired. Alternatively, opening the oven door too early lets a rush of cool air collapse the delicate structure.
-
-
Mistake: The batter tastes overwhelmingly bitter or metallic.
-
Fix: You used too much baking soda or low-quality food coloring. Stick to exact measurements and use gel color instead of liquid drops to avoid chemical off-flavors.
-
-
Mistake: The texture is sandy or grainy on the tongue.
-
Fix: You used a cheap, coarse rice flour blend. Upgrade to a finely milled 1-to-1 baking flour that utilizes superfine white rice flour and tapioca starch.
-
Expert-Level Insights and Insider Knowledge
Professional bakers understand that temperature control dictates the final crumb structure in gluten-free pastry. When you beat butter and sugar together, you are creating an emulsion that holds air. If your kitchen is freezing, the butter hardens and refuses to trap air. If your kitchen is a sauna, the butter melts completely, destroying the emulsion. Aim for a comfortable room temperature of 68°F to 72°F in your kitchen before you begin mixing.
Another insider secret: add a tiny pinch of espresso powder to your cocoa mixture. You won’t taste coffee in the final product; instead, the compounds in the coffee bean amplify the chocolate notes of the cocoa, giving the red velvet a richer, more complex background flavor that elevates it from simple sweetness to gourmet status.
Latest Trends and 2026 Baking Evolution
The world of gluten-free baking has undergone a quiet revolution over the past few years. Moving away from heavy bean flours and gritty whole-grain sorghum blends, modern innovators focus on precision-milled ancient grains and optimized starch ratios.
In 2026, home bakers have unprecedented access to commercial-grade 1-to-1 blends that mimic the protein elasticity of wheat almost perfectly. Furthermore, the culinary world has leaned hard into clean-label ingredients, pushing bakers away from artificial dyes toward plant-based concentrates like beet juice powder or high-potency natural carmine extracts, allowing bakers to achieve that striking crimson color without synthetic additives.
Future Outlook
As food science continues to decode the molecular structure of gluten, the gap between alternative baking and traditional pastry is rapidly shrinking. Soon, specialized enzyme treatments and alternative protein restructuring will make gluten-free baking entirely frictionless. Until then, mastering engineered recipes like this one ensures you are always two steps ahead of the curve, capable of producing professional-grade desserts in a standard home kitchen.
Mini Case Scenario: Sarah’s Bakery Dilemma
Sarah was tasked with baking three dozen cupcakes for her sister’s bridal shower. The catch? The bride-to-be and three key bridesmaids had severe celiac disease, while twenty other guests were vocal critics of gluten-free substitutes. Sarah had two choices: buy dry, pre-packaged cupcakes from a specialty store that tasted like sweetened cardboard, or engineer a recipe from scratch.
Opting for the latter, she followed a precision-engineered gluten-free red velvet formula utilizing a 1-to-1 blend, oil-butter pairing, and the crucial vinegar-baking soda activation step. She frosted them with a silky, piped cream cheese swirl and topped them with a dusting of red cake crumbs. At the shower, the box vanished within twelve minutes. The bride cried tears of joy, and three different guests asked Sarah for the bakery’s name. When she revealed she baked them in her home kitchen using gluten-free flour, nobody believed her. That is the power of mastering the science behind the recipe.
Frequently Asked Questions
-
Can I make these cupcakes dairy-free as well as gluten-free?
Yes. Substitute the butter with a high-fat plant-based baking stick (like Earth Balance or Miyoko’s), use plant-based milk soured with 1 tablespoon of lemon juice or apple cider vinegar in place of buttermilk, and swap the cream cheese frosting for a vegan cream cheese alternative.
-
Why did my red velvet cupcakes turn out brown instead of red?
This happens when you use too much cocoa powder or cheap food coloring that oxidizes during baking. Stick strictly to the measurements in the recipe and use a high-concentration red gel food coloring.
-
How should I store leftover gluten-free cupcakes?
Because gluten-free baked goods dry out faster than traditional pastries, store them in an airtight container in the refrigerator for up to 4 days. Bring them to room temperature for 30 minutes before serving to soften the butter and cream cheese.
-
Can I freeze these cupcakes before frosting them?
Absolutely. Wrap the cooled, unfrosted cupcakes individually in plastic wrap and place them in a freezer-safe bag for up to 2 months. Thaw them overnight in the refrigerator before bringing to room temperature and frosting.
-
Do I have to use xanthan gum if it’s already in my flour blend?
No. If your 1-to-1 baking flour package lists xanthan gum in the ingredients list, do not add extra. Adding more will cause your cupcakes to turn gummy and rubbery.
-
Can I turn this recipe into a full-sized layer cake?
Yes. This recipe yields enough batter for two 8-inch round cake pans. Keep in mind that bake times will increase to roughly 26 to 30 minutes at the same oven temperature.
-
Why is vinegar used in red velvet cake?
Vinegar reacts chemically with the baking soda and natural cocoa powder to create carbon dioxide gas bubbles, providing a natural lift and tenderizing the crumb while deepening the red pigment.
-
Can I use coconut oil instead of vegetable oil?
You can, but ensure it is refined coconut oil so it does not impart a tropical coconut flavor to your delicate red velvet cupcakes.
Action Checklist
-
What to do:
-
Weigh your gluten-free flour using a digital scale for maximum precision.
-
Ensure all liquid ingredients (eggs, butter, buttermilk) are at exact room temperature.
-
Mix the apple cider vinegar and baking soda right before folding it into the batter.
-
Use high-concentration red gel food coloring for vibrant color without excess liquid.
-
-
What to avoid:
-
Do not overmix the batter once the flour is added; stop as soon as streaks disappear.
-
Do not open the oven door during the first 15 minutes of baking.
-
Do not frost warm cupcakes, or the icing will melt instantly.
-
Do not use cheap, coarse rice flour blends that yield a gritty texture.
-
Achieving bakery-quality gluten-free red velvet cupcakes isn’t a matter of luck; it’s about respecting the chemical partnership between acid, fat, and a precision-engineered flour blend. Get the ratios right, control your temperatures, and watch everyone forget they are eating gluten-free.