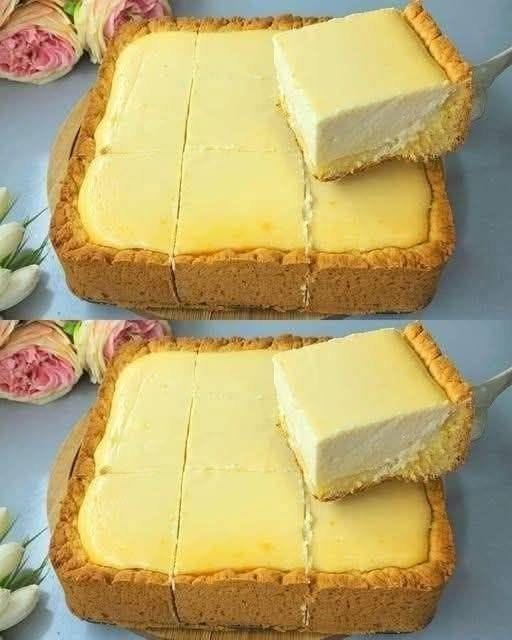
Classic British Custard Tart
There are some desserts that feel like a warm hug from the first bite, and classic British custard tart is one of them.
Picture a crisp, buttery pastry shell breaking gently under your fork. Inside is a smooth, creamy custard, softly scented with vanilla and a whisper of nutmeg. The top has just enough golden color to make you want to take a bite immediately.
It is simple food, but that is exactly why it is so special.
A British custard tart does not need layers of chocolate, mountains of frosting, or complicated decorations. It relies on a handful of humble ingredients and one very important thing: getting the custard just right.
The good news? You can make this classic bakery-style tart at home without being a pastry chef.
Once you learn how to blind-bake the pastry, temper the eggs properly, and bake the custard gently, you will have a beautiful tart with a crisp base and silky filling every time.
And there is something wonderfully old-fashioned about serving a slice with a cup of tea.
Meta description: Make a classic British custard tart with crisp buttery pastry, silky vanilla custard, and a delicate nutmeg topping. An easy traditional English dessert perfect with tea.
Why You’ll Love This Classic British Custard Tart
- Classic British comfort food: A timeless dessert that feels nostalgic and familiar.
- Simple ingredients: Flour, butter, eggs, milk, cream, sugar, and a few flavorings create something truly special.
- Creamy and crisp: The contrast between buttery pastry and silky custard is irresistible.
- Beginner-friendly: The recipe uses straightforward pastry and custard techniques.
- Perfect for afternoon tea: Serve it alongside a pot of black tea for a traditional treat.
- Make-ahead friendly: The tart needs time to cool and set, making it excellent for entertaining.
- Elegant without being fussy: A light dusting of nutmeg is all the decoration it needs.
- Family-friendly: Mild vanilla custard makes this a dessert almost everyone can enjoy.
- Nostalgic: It has the kind of flavor that can remind you of old-fashioned bakeries and family kitchens.
- Great for special occasions: Serve it for afternoon tea, Sunday lunch, holidays, or a classic British-themed gathering.
What Is a British Custard Tart?
A classic British custard tart is made with a pastry shell filled with baked egg custard.
The filling is traditionally made from milk, cream, eggs, sugar, and vanilla, then finished with a sprinkling of nutmeg.
Unlike a Portuguese pastel de nata, British custard tart is generally larger, thicker, and baked as one whole tart.
The custard should be delicate and creamy rather than rubbery.
The pastry should have enough structure to hold the filling while remaining crisp and buttery.
That contrast is what makes this simple dessert so memorable.
Ingredients
This recipe makes one 9-inch (23 cm) tart, serving approximately 8 people.
For the Pastry
- 250 g (2 cups) all-purpose flour
- 125 g (½ cup + 1 tablespoon) unsalted butter, cold and cubed
- 50 g (¼ cup) granulated sugar
- 1 large egg yolk
- 2–3 tablespoons (30–45 ml) cold water
- ¼ teaspoon fine salt
For the Custard
- 500 ml (2 cups) whole milk
- 125 ml (½ cup) heavy cream
- 4 large egg yolks
- 2 large eggs
- 75 g (⅓ cup + 1 tablespoon) granulated sugar
- 1 teaspoon pure vanilla extract
- ¼ teaspoon freshly grated nutmeg, plus extra for the top
Ingredient Notes
Butter: Use unsalted butter so you can control the salt. Cold butter is essential for flaky pastry.
Flour: Plain all-purpose flour works perfectly.
Egg yolks: Yolks make the custard rich and smooth.
Whole eggs: The whites add structure, helping the custard set without making it too fragile.
Whole milk: This creates the classic creamy texture.
Heavy cream: A little cream adds richness. If you prefer a lighter tart, you can replace it with additional whole milk, although the filling will be slightly less luxurious.
Nutmeg: Freshly grated nutmeg makes a noticeable difference. Its warm, slightly sweet aroma is one of the signatures of a traditional British custard tart.
PRO TIP: Do not overwork the pastry. The less you handle it once the flour is hydrated, the more tender the crust will be.
Nutritional Information
Approximate nutrition per slice, assuming 8 servings:
- Calories: 390
- Protein: 7 g
- Carbohydrates: 43 g
- Fat: 21 g
- Fiber: 1 g
- Sugar: 18 g
The tart also provides calcium, vitamin A, vitamin B12, phosphorus, and selenium from the eggs and dairy.
This is a traditional dessert rather than a low-calorie or low-sugar recipe.
Is British Custard Tart Gluten-Free?
No. Traditional pastry contains wheat flour.
For a gluten-free version, use a reliable gluten-free pastry flour blend designed for shortcrust pastry.
Is It Vegetarian?
Yes.
Is It Vegan?
No. The traditional recipe contains butter, milk, cream, and eggs.
Is It Dairy-Free?
Not as written. Dairy-free butter and plant-based milk alternatives can be used, but the custard texture may change.
Is It Keto?
No. The pastry and sugar make this a high-carbohydrate dessert.
Kitchen Tools Needed
Basic Tools
- 9-inch (23 cm) tart pan with removable bottom
- Mixing bowl
- Rolling pin
- Fork
- Baking parchment
- Baking weights or dried beans
- Saucepan
- Whisk
- Fine-mesh sieve
- Measuring cups and spoons
- Cooling rack
Optional Upgrades
- Digital kitchen scale
- Pastry cutter
- Pastry brush
- Instant-read thermometer
- Microplane grater for fresh nutmeg
No tart pan? A shallow 9-inch pie dish can work, although removing the tart will be less convenient.
How to Make Classic British Custard Tart
1. Make the pastry
Place the 250 g flour, 50 g sugar, and ¼ teaspoon salt into a large bowl.
Add the 125 g cold cubed butter.
Using your fingertips, rub the butter into the flour until the mixture resembles fine breadcrumbs.
Work quickly.
You want small pieces of butter distributed throughout the flour.
2. Add the egg yolk
Add the egg yolk.
Mix gently.
Add 2 tablespoons of cold water and bring the dough together with your hands.
If it still looks dry and crumbly, add another tablespoon of water.
Stop as soon as the dough comes together.
What should NOT happen: Do not knead the pastry like bread dough. That develops gluten and can make the crust tough.
3. Chill the pastry
Shape the dough into a flat disc.
Wrap it and refrigerate for at least 30 minutes.
This gives the butter time to firm up and allows the gluten to relax.
PRO TIP: Do not skip this step. Chilled pastry is much easier to roll and is less likely to shrink during baking.
4. Roll the pastry
Lightly flour your work surface.
Roll the pastry into a circle approximately 3–4 mm thick and slightly larger than your tart pan.
Carefully lift it into the pan.
Press it gently into the base and sides.
Do not stretch the pastry.
If you stretch it into place, it may shrink back during baking.
Trim the excess around the edge.
5. Chill again
Place the pastry-lined tart pan in the refrigerator for another 20–30 minutes.
Meanwhile, preheat the oven to 190°C (375°F).
6. Blind-bake the pastry
Prick the base lightly with a fork.
Place parchment paper over the pastry and fill with baking weights or dried beans.
Bake for 15 minutes.
Remove the parchment and weights.
Return the pastry to the oven and bake for another 5–8 minutes.
The pastry should look lightly golden and feel dry.
You do not want it deeply browned at this stage because it will bake again with the custard.
7. Lower the oven temperature
Reduce the oven to 160°C (320°F).
This lower temperature is important.
Custard needs gentle heat.
Too much heat can cause the eggs to overcook, creating a grainy or rubbery filling.
8. Make the custard
Place the 500 ml milk and 125 ml cream into a saucepan.
Heat over medium-low heat until steaming and hot.
Do not bring it to a rolling boil.
You want tiny bubbles around the edge and visible steam.
Remove from the heat.
9. Whisk the eggs and sugar
In a bowl, whisk together:
- 4 egg yolks
- 2 whole eggs
- 75 g sugar
- 1 teaspoon vanilla
Whisk gently until combined.
You do not need to whip lots of air into the mixture.
10. Temper the eggs
Slowly pour the hot milk mixture into the eggs while whisking continuously.
Start with a small amount.
Once that is incorporated, gradually add the remaining milk.
This process gently raises the temperature of the eggs without scrambling them.
What should NOT happen: Never dump all the boiling-hot milk into the eggs at once.
11. Strain the custard
Pour the custard through a fine-mesh sieve into a clean jug.
This catches any tiny cooked egg particles and creates a smoother final filling.
Add the nutmeg.
Give it a gentle stir.
CHEF’S TIP: Straining custard may seem like an unnecessary extra step, but it is one of the easiest ways to achieve that beautifully smooth bakery-style texture.
12. Fill the pastry
Place the partially baked pastry shell on a baking tray.
Carefully pour the custard into the shell.
If possible, pour while the tart is already positioned on the oven rack or very close to it. This reduces the chance of spilling the delicate filling.
Sprinkle the top lightly with freshly grated nutmeg.
13. Bake gently
Bake at 160°C (320°F) for approximately 30–40 minutes.
The exact time depends on your oven and the depth of your tart.
Look for a custard that is:
- Set around the edges
- Slightly wobbly in the center
- Smooth and pale
- Not cracked
- Fragrant with vanilla and nutmeg
The center should jiggle gently when the pan is moved.
It should not slosh like liquid.
Do not wait for the entire center to become completely firm in the oven.
The custard continues setting as it cools.
14. Cool completely
Remove the tart from the oven.
Allow it to cool at room temperature for approximately 1 hour.
Then refrigerate for at least 2 hours before slicing.
This resting time is important for clean slices.
If you cut it too early, the custard may not hold its shape.
15. Slice and serve
Use a sharp knife to cut the tart into wedges.
For especially clean slices, wipe the knife between cuts.
Serve chilled or allow the tart to sit at room temperature for about 15–20 minutes before serving.
The slightly softened custard has a wonderful texture.
Chef-Level Tips and Mistakes to Avoid
Mistake 1: Overworking the pastry
Too much mixing makes pastry tough.
Handle it gently.
Mistake 2: Skipping the blind bake
Raw pastry underneath custard can become soggy.
Blind baking creates a barrier that helps keep the base crisp.
Mistake 3: Boiling the milk
You only need hot, steaming milk.
Boiling milk can make tempering more difficult and may affect the texture.
Mistake 4: Overheating the custard
If the oven is too hot, the eggs can overcook.
The result is a grainy filling with a curdled appearance.
Low and slow is the way to go.
Mistake 5: Overbaking
A perfectly baked custard should still have a gentle wobble.
If the entire surface looks completely firm and puffy, it may already be overbaked.
Mistake 6: Cutting it while hot
Give it time to cool and set.
Patience is part of the recipe.
PRO TIP: If your custard develops tiny bubbles on the surface before baking, gently skim them away with a spoon. A bubble-free surface gives you a smoother, more traditional finish.
Variations and Customizations
Classic Extra-Nutmeg Version
If you love traditional British flavors, add a generous but delicate layer of freshly grated nutmeg before baking.
Do not cover the entire tart with a thick layer.
You want the nutmeg to perfume the custard rather than dominate it.
Lemon Custard Tart
Add the finely grated zest of 1 lemon to the warm milk before straining.
The citrus gives the creamy custard a bright, fresh edge.
Orange and Nutmeg Tart
Replace half the lemon zest with orange zest.
Orange pairs beautifully with vanilla, cream, and nutmeg.
Cinnamon Custard Tart
Add a small pinch of ground cinnamon to the custard.
This is not the most traditional version, but it makes a lovely autumn-inspired dessert.
Lighter Version
Replace the heavy cream with an additional 125 ml (½ cup) whole milk.
The custard will be slightly less rich but still creamy and delicious.
Individual Custard Tarts
Divide the pastry and custard among small tart tins.
Reduce the baking time and begin checking after approximately 20–25 minutes.
Individual tarts are perfect for afternoon tea or parties.
Storage and Reheating Guide
Refrigerator
Store the custard tart covered in the refrigerator for up to 3 days.
Because the filling contains eggs and dairy, keep it refrigerated.
Freezing
Freezing is possible, but it is not ideal.
The custard can become slightly watery or change texture after thawing.
For the best results, enjoy the tart fresh or within a few days.
Can You Reheat Custard Tart?
You can gently warm a slice, but this dessert is traditionally served chilled or at room temperature.
If you want to warm it, place a slice in a low oven at around 140°C (285°F) for approximately 8–10 minutes.
Avoid high heat.
Microwaving can make the custard rubbery and unevenly heated.
Serving Suggestions
Classic British custard tart is wonderfully simple.
Serve a slice with:
- A pot of English breakfast tea
- Earl Grey tea
- Fresh berries
- Lightly whipped cream
- Fresh strawberries
- A small spoonful of berry compote
For a traditional presentation, simply place a neat slice on a small plate and let the nutmeg-speckled custard take center stage.
You can add a tiny dusting of powdered sugar, but it is not necessary.
How to Serve It for Afternoon Tea
If you are planning an afternoon tea, cut the tart into smaller wedges.
Serve alongside tea sandwiches, scones, fresh berries, and small biscuits.
The creamy custard provides a lovely contrast to crisp cookies and flaky pastries.
For a more modern presentation, serve individual slices with a few fresh berries and a small spoonful of softly whipped cream.
Frequently Asked Questions
What is a traditional British custard tart made of?
A traditional British custard tart consists of a shortcrust pastry shell filled with baked egg custard made from milk, eggs, sugar, and usually vanilla. Nutmeg is commonly sprinkled over the top.
Why is my custard tart watery?
The custard may be underbaked, or the tart may have been sliced before it had enough time to cool and set. Make sure the center has a gentle wobble rather than looking liquid.
Why did my custard tart crack?
Cracking usually means the custard was exposed to too much heat or was baked for too long. Use a moderate oven temperature and remove the tart while the center still has a slight jiggle.
How do I stop the pastry from going soggy?
Blind-bake the pastry before adding the custard. Make sure the base is dry and lightly golden before filling it.
Should British custard tart be refrigerated?
Yes. Because the filling contains eggs and dairy, refrigerate leftover tart in a covered container.
Can I make custard tart the day before?
Absolutely. In fact, making it a day ahead can be helpful because the custard has plenty of time to set. Keep it refrigerated and bring it out shortly before serving.
Can I use vanilla extract instead of vanilla bean?
Yes. Vanilla extract is convenient and works very well. If you want an especially luxurious flavor, you can use the seeds from one vanilla bean instead.
Final Thoughts
A classic British custard tart is a beautiful reminder that great desserts do not have to be complicated.
A little butter.
A little flour.
Some eggs, milk, cream, sugar, vanilla, and nutmeg.
That is all it takes to create something that feels wonderfully special.
The crisp pastry gives you that satisfying first crack beneath the fork. Then comes the smooth custard—cool, creamy, softly sweet, and fragrant with vanilla. The nutmeg adds that unmistakable old-fashioned finish.
It is the sort of dessert that belongs on a quiet afternoon table with a steaming cup of tea nearby.
And once you make it yourself, you may never look at a bakery custard tart quite the same way again.
If you try this classic British custard tart, leave a comment and tell me how it turned out. Did you keep it traditional with vanilla and nutmeg, or add your own twist? Share the recipe with a fellow custard lover and save it for your next afternoon tea, Sunday lunch, or cozy baking day.
Now put the kettle on, slice yourself a generous piece, and enjoy one of Britain’s most comforting classic desserts.