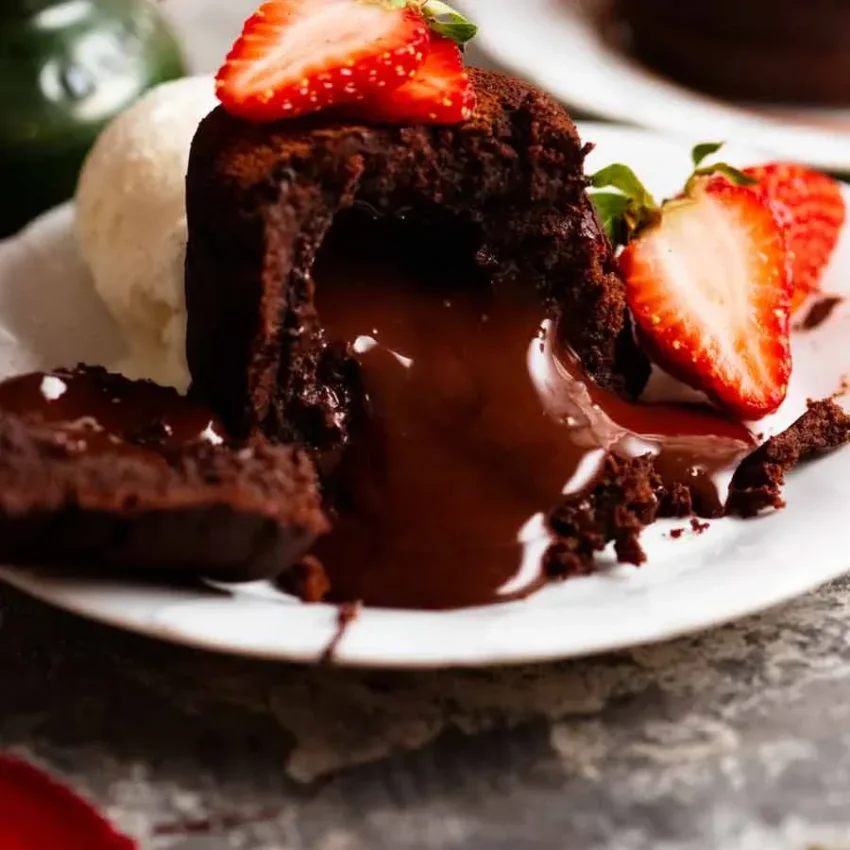
Molten Chocolate Lava Cake
Cut into a warm chocolate lava cake and watch the center spill out.
That first crack through the delicate cake feels almost magical. The outside is soft and rich, while the middle is warm, glossy, and intensely chocolatey, flowing onto the plate like a little river of melted chocolate.
Then comes the best part: that first bite with a spoonful of cold vanilla ice cream.
Warm cake.
Silky chocolate.
Cold, creamy ice cream.
It is the kind of dessert that makes everyone at the table stop talking for a moment.
This Molten Chocolate Lava Cake may look like something reserved for fancy restaurants, but it is surprisingly simple to make at home. You need just a handful of everyday ingredients, a few small ramekins, and the right baking time.
The secret is knowing exactly when to pull the cakes from the oven.
Bake them too long, and you get a regular chocolate cake.
Bake them too little, and they may collapse before you can serve them.
Get that timing right, and you get the glorious molten center that makes lava cake so special.
Meta description: Make rich Molten Chocolate Lava Cake with a soft chocolate cake exterior and warm, gooey molten center. An easy restaurant-style dessert ready in minutes.
Why You’ll Love This Molten Chocolate Lava Cake
- Ultra chocolatey: Real chocolate and cocoa create deep, rich flavor.
- Molten center: Cut into the cake and discover a warm flowing chocolate middle.
- Restaurant-style dessert: Looks impressive without complicated techniques.
- Quick to prepare: The batter takes only about 10–15 minutes.
- Small-batch friendly: Perfect when you want dessert without making a huge cake.
- Perfect for date night: An easy dessert that feels incredibly special.
- Beginner-friendly: Once you understand the baking cues, it is surprisingly easy.
- Make-ahead friendly: The ramekins can be prepared before dinner.
- Naturally portioned: Each person gets their own warm chocolate cake.
- Pure comfort food: Rich, warm chocolate in individual servings is hard to resist.
What Is Chocolate Lava Cake?
Chocolate lava cake is an individual chocolate dessert with a baked exterior and a soft, molten center.
It is sometimes called molten chocolate cake.
The outside resembles a tender flourless-style chocolate cake, while the center remains soft enough to flow when cut.
The trick is not a complicated filling.
Instead, the batter is baked for a short period at a high temperature so the outer portion sets while the center remains molten.
That means baking time is everything.
Ingredients
This recipe makes 4 individual lava cakes.
For the Cakes
- 115 g (½ cup) unsalted butter
- 170 g (6 oz) dark or semi-sweet chocolate, finely chopped
- 3 large eggs
- 2 large egg yolks
- 60 g (¼ cup + 1 tablespoon) granulated sugar
- 1 teaspoon pure vanilla extract
- ¼ teaspoon fine salt
- 30 g (¼ cup) all-purpose flour
- 1 tablespoon unsweetened cocoa powder, optional for deeper chocolate flavor
For Preparing the Ramekins
- 1 tablespoon softened butter
- 1 tablespoon unsweetened cocoa powder
Optional for Serving
- Vanilla ice cream
- Powdered sugar
- Fresh raspberries
- Strawberries
- Chocolate sauce
- Caramel sauce
- Fresh mint
- Flaky sea salt
Ingredient Notes
Chocolate
Use good-quality chocolate because it is one of the main flavors.
Dark chocolate between 60–70% cocoa gives a rich, balanced result.
If you prefer sweeter lava cakes, use semi-sweet chocolate.
Butter
Butter provides richness and helps create the soft cake texture.
Use unsalted butter so you can control the salt.
Eggs and Egg Yolks
The whole eggs provide structure.
The extra yolks add richness and help keep the center soft.
Flour
There is only a small amount of flour.
That is intentional.
Too much flour would create a firmer, cakier dessert.
Cocoa Powder
Cocoa powder is optional but adds another layer of chocolate intensity.
Sugar
The amount is deliberately moderate because the chocolate already provides sweetness.
Nutritional Information
Approximate nutrition per lava cake, without ice cream or toppings:
- Calories: 510
- Protein: 8 g
- Carbohydrates: 43 g
- Fat: 34 g
- Fiber: 4 g
- Sugar: 28 g
Values are estimates and vary depending on the chocolate used.
Is Lava Cake Gluten-Free?
Not as written because it contains flour.
You can replace the all-purpose flour with a suitable 1:1 gluten-free baking flour.
Is It Dairy-Free?
No.
Butter and chocolate contain dairy unless dairy-free alternatives are used.
Is It Vegan?
No. Eggs and butter are essential to this traditional version.
Is It Keto?
Not as written because it contains sugar and flour.
Is It Weight-Loss Friendly?
This is an indulgent dessert rather than a low-calorie recipe.
Enjoy it as an occasional treat.
Kitchen Tools Needed
Basic Tools
- 4 ramekins, approximately 6 oz / 170 ml each
- Baking sheet
- Heatproof bowl
- Whisk
- Rubber spatula
- Measuring spoons
- Small saucepan
Optional
- Digital kitchen scale
- Fine-mesh sieve
- Pastry brush
- Instant-read thermometer
A kitchen scale is especially helpful for accurately measuring chocolate and flour.
How to Make Molten Chocolate Lava Cake
1. Preheat the oven
Preheat your oven to 220°C (425°F).
Place a rack in the center of the oven.
The oven must be fully heated before the cakes go in.
This is important because the cakes bake quickly.
2. Prepare the ramekins
Generously butter four ramekins.
Dust the insides with cocoa powder.
Rotate each ramekin so the cocoa coats the bottom and sides.
Tap out the excess.
The cocoa coating prevents sticking while also avoiding a white flour coating on the finished cakes.
PRO TIP: Pay special attention to the corners and edges of the ramekins. Lava cakes are delicate, and even a small area that sticks can cause the cake to break during unmolding.
3. Melt the butter and chocolate
Place 115 g butter and 170 g chopped chocolate in a heatproof bowl.
Set the bowl over a saucepan containing a small amount of gently simmering water.
The bottom of the bowl should not touch the water.
Stir occasionally until smooth.
Alternatively, microwave in 20–30 second intervals, stirring between each interval.
The mixture should be glossy and completely smooth.
Remove from the heat.
Let it cool for approximately 5 minutes.
WHAT SHOULD NOT HAPPEN: Do not let water get into the chocolate. Even a small amount can cause melted chocolate to seize and become grainy.
4. Whisk the eggs and sugar
In a separate bowl, combine:
- 3 eggs
- 2 egg yolks
- 60 g sugar
Whisk for approximately 1–2 minutes.
You do not need to whip the mixture into a thick foam.
You simply want the eggs and sugar well combined.
Add the vanilla extract and salt.
5. Combine the chocolate mixture
Slowly pour the warm chocolate-butter mixture into the egg mixture while whisking gently.
Keep stirring until smooth.
The batter should look glossy and rich.
Do not pour extremely hot chocolate directly onto the eggs without stirring, as the heat can partially cook them.
6. Add the flour
Sift the flour and optional cocoa powder into the bowl.
Fold gently with a rubber spatula.
Stop as soon as the flour disappears.
Do not overmix.
The batter should be smooth but fairly thick.
7. Fill the ramekins
Divide the batter evenly between the four prepared ramekins.
They should be approximately ¾ full.
Place the ramekins on a baking sheet.
This makes them easier to transfer into and out of the oven.
8. Bake
Place the tray in the center of the preheated oven.
Bake at 220°C (425°F) for approximately 10–12 minutes.
Start checking at 10 minutes.
The edges should look firm and set.
The tops should be puffed.
The centers should still look slightly soft.
A small jiggle when you gently move the baking sheet is a good sign.
THE MOST IMPORTANT STEP: Do not wait for the centers to become completely firm. If the middle looks fully baked, you may have lost the molten texture.
9. Rest briefly
Remove the ramekins from the oven.
Let them rest for 1 minute.
Do not leave them sitting for 10–15 minutes.
They will continue cooking from residual heat.
10. Unmold
Place a small plate over each ramekin.
Carefully flip it over.
Let the cake sit upside down for a few seconds.
Then gently lift the ramekin.
The cake should release and stand beautifully on the plate.
If necessary, run a thin knife around the edge.
11. Serve immediately
Dust with powdered sugar.
Add fresh berries.
Place a scoop of vanilla ice cream beside the cake.
Then cut into the center.
The chocolate should flow out while the cake is still warm.
That is your moment.
How to Know When Lava Cake Is Done
Because ovens vary, visual cues are more useful than simply following a timer.
Perfectly baked
- Edges are firm.
- Top is set.
- Center has a slight wobble.
- Cake feels soft when gently touched.
Undercooked
- Top looks very wet.
- Edges are not set.
- Cake collapses immediately when unmolded.
Bake for another 1–2 minutes.
Overcooked
- Center is completely firm.
- Cake looks dry.
- No soft movement in the middle.
It will still taste delicious, but it will be closer to a traditional chocolate cake.
Chef-Level Tips for Perfect Lava Cake
Use good chocolate
The chocolate is the star.
Choose one you genuinely enjoy eating.
Do not overmix
Overmixing develops gluten and can make the cake tougher.
Use matching ramekins
Different ramekin sizes bake at different speeds.
Use ramekins that are approximately the same size.
Preheat properly
Starting in a cold or partially heated oven can throw off the baking time.
Serve immediately
Lava cake waits for nobody.
The longer it sits, the more the center continues to set.
CHEF’S TIP: If you are serving lava cakes for guests, prepare the ramekins ahead of time and keep them refrigerated. Bring them out while dinner is being cleared, then bake them fresh. This gives you restaurant-style timing without last-minute stress.
Common Mistakes to Avoid
Mistake 1: Overbaking
This is the most common problem.
Even one or two extra minutes can make a major difference.
Mistake 2: Using too much flour
Lava cake should not have a large amount of flour.
Mistake 3: Not greasing the ramekins
A stuck lava cake can collapse during unmolding.
Mistake 4: Making the chocolate too hot
Hot chocolate can scramble the eggs.
Let it cool slightly before combining.
Mistake 5: Waiting too long before serving
The center continues to cook.
Serve as soon as possible.
Mistake 6: Using oversized ramekins
The batter will be too shallow and the baking time will change.
Make-Ahead Instructions
One of the best things about lava cake is that you can prepare it ahead.
Prepare the batter and fill the buttered, cocoa-dusted ramekins.
Cover tightly.
Refrigerate for up to 24 hours.
When ready to bake, place the cold ramekins on a baking sheet.
You may need to add approximately 1–2 minutes to the baking time.
Watch the visual cues rather than relying only on the clock.
Variations and Customizations
Salted Caramel Lava Cake
Add a small spoonful of thick caramel sauce to the center of each ramekin before baking.
Finish with flaky sea salt.
Espresso Chocolate Lava Cake
Add 1 teaspoon instant espresso powder to the melted chocolate.
Coffee intensifies the chocolate flavor beautifully.
Orange Chocolate Lava Cake
Add 1 teaspoon finely grated orange zest to the batter.
Chocolate and orange are a classic combination.
Peanut Butter Lava Cake
Place 1 teaspoon creamy peanut butter in the center of each filled ramekin.
Cover gently with a little more batter.
Raspberry Chocolate Lava Cake
Add a few fresh raspberries to the center before baking.
The tart berries create a beautiful contrast with the rich chocolate.
Mint Chocolate Lava Cake
Add ¼–½ teaspoon peppermint extract.
Serve with vanilla or mint ice cream.
White Chocolate Center
Place a small piece of white chocolate in the center of each ramekin before baking.
It creates a creamy surprise inside the dark chocolate cake.
Restaurant-Style Version
Want to make your lava cake look like it came from a high-end restaurant?
Start with a large white plate.
Place the cake slightly off-center.
Add a scoop of vanilla ice cream beside it.
Dust the cake lightly with powdered sugar.
Add a few raspberries or strawberries.
Drizzle a thin line of chocolate sauce or raspberry coulis across the plate.
Finish with a tiny mint leaf.
Keep the plate clean around the edges.
The dessert should look elegant, not crowded.
Did You Know?
Chocolate lava cake became famous in American fine dining in the late 20th century, but its exact origin is often debated.
The dessert became especially popular because it combines two textures people love: a tender baked chocolate exterior and a soft, molten center.
That contrast is what makes it so memorable.
Storage and Reheating
Lava cake is best eaten immediately after baking.
However, if necessary, you can refrigerate leftover baked cakes in an airtight container for up to 2 days.
The center will become firmer after refrigeration.
Reheating
Warm gently in the microwave for approximately 10–20 seconds.
Check the center before adding more time.
Do not overheat or the cake can become dry.
Freezing
You can freeze unbaked, filled ramekins.
Cover them very tightly and freeze for up to 1 month.
Bake directly from frozen, adding approximately 2–4 minutes to the baking time.
Always check the center visually.
Serving Suggestions
Classic Pairing
- Vanilla ice cream
- Powdered sugar
- Fresh berries
Extra Indulgent
- Chocolate sauce
- Salted caramel
- Chocolate shavings
- Toasted hazelnuts
Fresh and Bright
- Raspberries
- Strawberries
- Orange zest
- Raspberry sauce
Drink Pairings
Serve with:
- Espresso
- Cappuccino
- Black coffee
- Hot chocolate
- Chai tea
- Dessert wine
The bitterness of coffee is especially good with the sweetness of the cake.
Frequently Asked Questions
Why is my chocolate lava cake not molten?
It was most likely baked too long. Start checking the cakes around 10 minutes. The edges should be set while the center remains soft and slightly jiggly.
Can I make lava cake ahead of time?
Yes. Prepare and fill the ramekins up to 24 hours ahead and refrigerate them. Bake just before serving.
Can I freeze lava cake?
Yes. Unbaked filled ramekins can be tightly covered and frozen for up to about one month. Add a few extra minutes to the baking time.
Can I use milk chocolate?
Yes, but the finished cake will be sweeter and less intense. Dark or semi-sweet chocolate usually gives a better balance.
Can I make lava cake without ramekins?
You can use small oven-safe baking dishes, but the shape and baking time may change. Ramekins provide the most reliable result.
Why did my lava cake collapse?
It may have been slightly underbaked, unmolded too aggressively, or left to rest too long. Let it rest for only about one minute before turning it onto a plate.
Can I make gluten-free lava cake?
Yes. Replace the small amount of all-purpose flour with a suitable 1:1 gluten-free flour blend.
Final Thoughts
There are desserts you eat because they are delicious.
And then there are desserts that create a little event.
Molten Chocolate Lava Cake is an event.
You bring the warm cake to the table.
Everyone watches.
Someone reaches for a spoon.
The cake is cut open.
And suddenly that glossy chocolate center starts flowing onto the plate.
Add cold vanilla ice cream and a few berries, and you have a dessert that feels far more complicated than it actually is.
The secret is simple: use good chocolate, prepare the ramekins carefully, and watch the oven closely.
Most importantly, do not be afraid to take the cakes out while the centers still look soft.
That softness is exactly what you came for.
If you make these Molten Chocolate Lava Cakes, leave a comment and tell me how your centers turned out. Did you try salted caramel, peanut butter, espresso, or classic vanilla ice cream? Share this recipe with a fellow chocolate lover and save it for your next date night, dinner party, or serious chocolate craving.
Now grab those ramekins, melt the chocolate, and get ready to make dessert feel a little magical.