Cherry Pie Bars – Buttery, Sweet, and Bursting with Cherry Flavor
There’s something magical about the smell of sweet cherries bubbling in the oven. The moment that warm, buttery aroma fills the kitchen, it instantly feels like home.
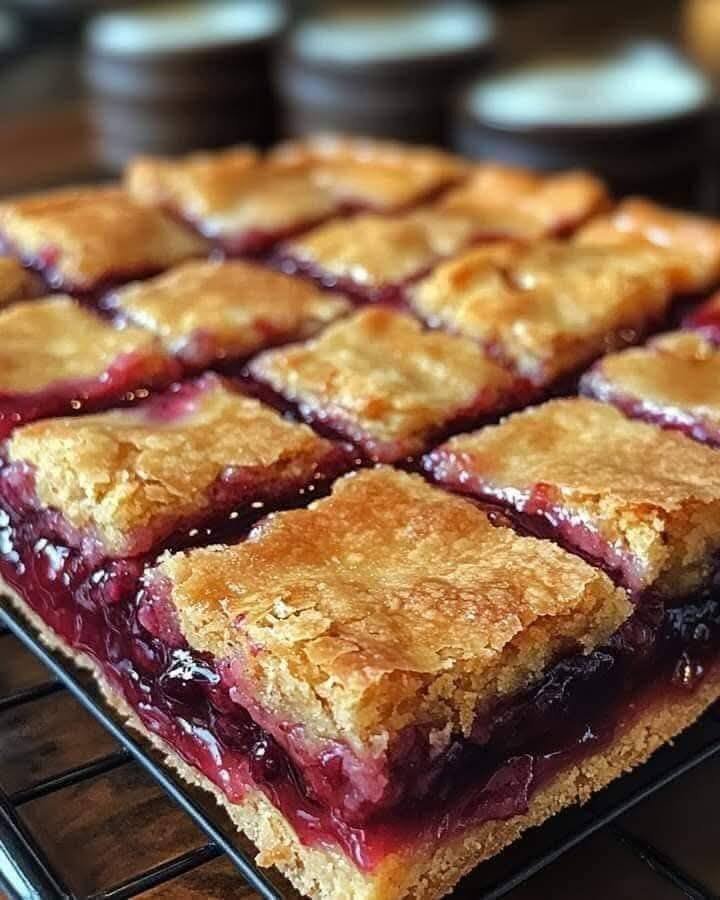
I remember the first time I made Cherry Pie Bars for a family gathering. Instead of making a traditional pie—which can be a little time-consuming—I decided to try a bar version. The result? A tray of golden, buttery crust layered with luscious cherry filling and finished with a delicate glaze.
As soon as I cut the first square, the cherries peeked through the crumbly top, glistening like jewels. The texture was perfect: soft, buttery base… juicy sweet-tart cherries… and a lightly crisp top layer.
Within minutes, the tray was half empty.
Cherry Pie Bars are everything we love about cherry pie—but easier, quicker, and perfect for sharing. Whether you’re baking for a family dessert, a picnic, or just craving something sweet with your coffee, this recipe delivers comfort, flavor, and pure dessert bliss in every bite.
Why You’ll Love This Recipe
Here’s why these Cherry Pie Bars quickly become a household favorite:
-
Easier than traditional pie – No rolling complicated pie crust.
-
Perfect for sharing – Slice into bars for parties and gatherings.
-
Budget-friendly ingredients – Uses simple pantry staples.
-
Kid-friendly dessert – Sweet, fruity, and easy for little hands.
-
Make-ahead friendly – Great for prepping a day before events.
-
Flexible recipe – Works with fresh, frozen, or canned cherries.
-
Beautiful presentation – Bright red cherries look stunning in bars.
Ingredients (With Exact Measurements)
This recipe makes 16–20 bars.
For the Crust and Topping
-
Unsalted butter (softened) – 230 g | 1 cup | 8 oz
-
Granulated sugar – 200 g | 1 cup | 7 oz
-
Large eggs – 2
-
Vanilla extract – 1 teaspoon | 5 ml
-
All-purpose flour – 300 g | 2 ½ cups | 10.5 oz
-
Baking powder – 1 teaspoon | 5 g
-
Salt – ½ teaspoon | 3 g
For the Cherry Filling
-
Cherry pie filling – 600 g | 2 cups | 21 oz
(or homemade cherry filling made from fresh cherries)
For the Glaze
-
Powdered sugar – 120 g | 1 cup | 4.2 oz
-
Milk – 2 tablespoons | 30 ml
-
Vanilla extract – ½ teaspoon
Healthy Substitutes
You can adjust the recipe depending on dietary needs:
-
Gluten-Free: Use gluten-free 1:1 baking flour.
-
Lower Sugar: Replace half the sugar with coconut sugar.
-
Dairy-Free: Use vegan butter instead of regular butter.
-
Natural Sweetener: Replace sugar with maple sugar or honey powder.
Nutritional Information (Per Serving)
Approximate values for 1 bar (based on 18 servings):
-
Calories: 230 kcal
-
Protein: 3 g
-
Carbohydrates: 34 g
-
Fats: 10 g
-
Fiber: 1 g
Vitamins & Minerals
-
Vitamin C (from cherries)
-
Potassium
-
Iron
-
Calcium (small amount)
Dietary Notes
-
❌ Not keto
-
❌ Not vegan (unless modified)
-
❌ Not gluten-free (unless flour substituted)
Kitchen Tools Needed
You don’t need anything fancy to make these bars.
Essential tools include:
-
9×13 inch baking pan
-
Mixing bowls
-
Electric mixer or hand whisk
-
Rubber spatula
-
Measuring cups and spoons
-
Parchment paper
-
Cooling rack
-
Small bowl for glaze
Step-by-Step Preparation
Follow these simple steps to create perfect Cherry Pie Bars.
Step 1: Preheat the Oven
Preheat your oven to:
175°C (350°F)
Line a 9×13-inch baking pan with parchment paper for easy removal.
Step 2: Cream Butter and Sugar
In a large bowl:
-
Add softened butter and sugar.
-
Beat with an electric mixer for 3–4 minutes.
The mixture should become:
-
Light
-
Creamy
-
Fluffy
Pro Tip: Proper creaming creates a soft and tender crust.
Step 3: Add Eggs and Vanilla
Add:
-
2 eggs
-
1 teaspoon vanilla extract
Mix until smooth and fully combined.
Step 4: Mix Dry Ingredients
In another bowl combine:
-
Flour
-
Baking powder
-
Salt
Gradually add the dry ingredients to the butter mixture.
Mix until a soft dough forms.
Step 5: Form the Bottom Crust
Spread about two-thirds of the dough evenly into the prepared pan.
Use a spatula or your fingers to press it down.
The layer should be:
-
Even
-
Slightly thick
-
Smooth
Step 6: Add Cherry Filling
Spread the cherry pie filling evenly across the crust.
Make sure the cherries cover the entire surface.
Step 7: Add the Crumble Topping
Take the remaining dough and drop small pieces over the cherry layer.
Don’t worry about perfect coverage — a rustic crumble look is ideal.
Step 8: Bake
Place the pan in the oven and bake for:
35–40 minutes
The bars are ready when:
-
The top turns light golden brown
-
The cherry filling bubbles slightly
Step 9: Cool Completely
Allow the bars to cool in the pan for at least 1 hour.
This helps them set properly before cutting.
Step 10: Add the Glaze
In a small bowl mix:
-
Powdered sugar
-
Milk
-
Vanilla
Whisk until smooth.
Drizzle lightly over the cooled bars.
Step 11: Slice and Serve
Cut into 16–20 squares and enjoy!
The texture should be:
-
Buttery
-
Soft
-
Slightly crumbly
-
Packed with juicy cherries
Expert Cooking Tips & Mistakes to Avoid
Even simple recipes can go wrong. Here are some expert tips.
1. Use Softened Butter
Cold butter won’t cream properly.
Let butter sit at room temperature for 20–30 minutes.
2. Don’t Overmix the Dough
Overmixing can make bars tough.
Mix just until the ingredients combine.
3. Use Good Cherry Filling
High-quality filling gives better flavor.
If possible, try homemade cherry filling.
4. Let Bars Cool Completely
Cutting too early can cause messy bars.
Cooling allows the filling to set.
5. Line the Pan
Parchment paper makes removing and slicing bars much easier.
Variations & Customizations
This recipe is very flexible. Try these fun variations.
1. Spicy Cherry Bars
Add a surprising twist:
-
¼ teaspoon cinnamon
-
Pinch of chili powder
-
¼ teaspoon nutmeg
The spices enhance the cherry flavor beautifully.
2. Healthy Version
Make it lighter with these swaps:
-
Use whole wheat flour
-
Reduce sugar by 25%
-
Use fresh cherries instead of canned filling
3. Kids-Friendly Version
Kids love sweeter desserts.
Try:
-
White chocolate drizzle
-
Rainbow sprinkles
-
Mini chocolate chips in the topping
4. Berry Mix Version
Replace cherries with:
-
Blueberries
-
Raspberries
-
Strawberries
-
Mixed berry filling
5. Almond Cherry Bars
Add ½ teaspoon almond extract to the dough.
Cherry and almond flavors pair beautifully.
Storage & Reheating Instructions
These bars store wonderfully.
Refrigerator
Store in an airtight container for:
4–5 days
Freezer
Cherry Pie Bars freeze very well.
-
Wrap individually
-
Store in freezer-safe bags
They last up to 3 months.
Best Reheating Method
For warm bars:
Microwave:
15–20 seconds
Oven:
160°C (320°F) for 5 minutes
Warm bars taste amazing with melting glaze.
Serving Suggestions
Cherry Pie Bars are delicious on their own, but even better with these pairings.
Classic Pairings
-
Vanilla ice cream
-
Fresh whipped cream
-
Powdered sugar dusting
Drinks
Serve with:
-
Hot coffee
-
Cappuccino
-
Vanilla latte
-
Cold milk
Fancy Dessert Idea
Serve warm bars with:
-
Ice cream
-
Chocolate drizzle
-
Fresh cherries on top
Perfect for dinner parties.
FAQs
1. Can I use fresh cherries instead of pie filling?
Yes! Use about 500 g (3 cups) pitted cherries and cook them with sugar and cornstarch to create a thick filling.
2. Why are my bars falling apart?
They may not have cooled enough.
Let them cool at least 1 hour before slicing.
3. Can I make Cherry Pie Bars ahead of time?
Absolutely. They taste even better the next day once the flavors settle.
4. What pan size works best?
A 9×13 inch pan works perfectly for the right thickness.
5. Can I skip the glaze?
Yes. The bars are still delicious without it.
But the glaze adds a bakery-style finish.
6. Can I double the recipe?
Yes! Use a larger sheet pan and increase baking time by about 5–10 minutes.
There’s a reason Cherry Pie Bars are loved by home bakers everywhere. They combine the comfort of homemade pie with the ease of a simple dessert bar.
Buttery crust, juicy cherries, and sweet glaze come together to create a treat that’s irresistible, beautiful, and perfect for sharing.
So grab your mixing bowl and give this recipe a try!
When you make these Cherry Pie Bars:
-
Leave a comment with your results
-
Share the recipe with friends and family
-
Snap a photo and show off your baking masterpiece
Because once you taste that sweet cherry filling and buttery crust, you’ll want to bake them again and again. 🍒✨