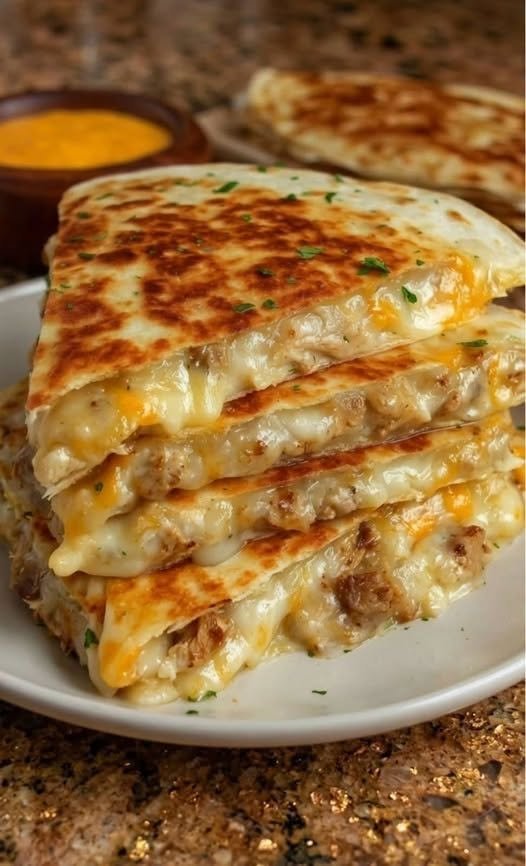
The Ultimate Crispy, Cheesy Meat Quesadilla: Your Blueprint for Pan-Seared Perfection
Master the art of the golden crunch. Learn how to build a towering stack of pan-grilled cheesy meat quesadilla triangles with edges that shatter, centers that ooze, and dipping sauces that steal the show.
Master crispy pan-grilled cheesy meat quesadillas. Get expert tips for golden, flaky tortillas, melty cheese pulls, and the ultimate dipping sauces.
When Comfort Food Meets Culinary Precision
Let’s be honest: few culinary sights rival a neat stack of golden, pan-grilled cheesy meat quesadilla triangles, glistening slightly from the skillet, with threads of melted cheese peeking invitingly from the seams. It is the undisputed heavyweight champion of comfort food. It hits every sensory note at once—the crunch of blistered flour tortilla, the savory punch of seasoned meat, and the rich, velvety pull of molten cheese.
Yet, how many times have you ordered or made a quesadilla only to find it soggy in the middle, burnt on the outside, or stubbornly dry?
Achieving that restaurant-quality perfection isn’t about luck. It is about understanding the delicate choreography of heat management, moisture control, and fat ratios. Whether you are feeding a hungry household on a Tuesday night or looking for a crowd-pleasing weekend snack, this guide takes you behind the scenes to build the ultimate pan-grilled quesadilla stack.
The Anatomy of an Elite Quesadilla
To build something extraordinary out of just a few basic ingredients—tortillas, cheese, and meat—you have to optimize every single component.
1. The Tortilla Choice
Skip the brittle corn tortillas if you want that classic, foldable, wide-surface crunch (unless you’re doubling them up street-style). Go for fresh, medium-to-large flour tortillas. They offer enough structural integrity to hold a heavy filling without tearing, and their natural sugars caramelize beautifully when introduced to butter or oil in a hot pan, yielding those gorgeous golden-brown leopard spots.
2. The Cheese as Structural “Glue”
Never treat cheese as an afterthought. In a quesadilla, cheese plays structural engineering. You want a blend that offers both elite meltability and distinct flavor:
-
The Melters: Oaxaca, low-moisture Mozzarella, or Monterey Jack provide that legendary, Instagram-worthy cheese pull.
-
The Flavor Drivers: Sharp Cheddar or Pepper Jack introduce a necessary kick and depth that cuts through the richness.
-
The Pro Tip: Always layer your cheese in a “sandwich” format—cheese on the bottom, meat in the middle, and more cheese on top. The melting cheese acts as an adhesive, locking the layers together so your filling doesn’t spill out when you flip.
3. The Meat Filling: Keeping It Dry and Flavorful
The number one enemy of a crispy quesadilla is moisture. If your taco-spiced ground beef, shredded carne asada, or pulled chicken is dripping with watery sauce or grease, your tortilla will steam instead of fry.
-
Always drain excess fat from your ground meats.
-
If using simmered fillings, reduce them until almost dry before assembling.
Step-by-Step: Mastering the Pan-Sear
Getting that deep, even golden crunch requires treating your skillet like a canvas. Here is how to execute it step-by-step:
-
Step 1: Prep Your Stations. Have your grated cheese, warm cooked meat, and tortillas laid out assembly-line style. Speed prevents over-cooking.
-
Step 2: Control the Heat. Set a large non-cast-iron or well-seasoned cast-iron skillet over medium-low heat. Do not crank the burner to high. If the pan is too hot, the tortilla will burn to a crisp before the cheese in the core has time to melt completely.
-
Step 3: Introduce the Fat. Melt half a tablespoon of butter or brush a thin layer of neutral high-smoke-point oil (like avocado oil) directly into the pan.
-
Step 4: Toast and Press. Lay the tortilla down, build your halves (or layer two separate tortillas if you prefer the flat-stack method), and let it sizzle for 2 to 3 minutes. Press down gently with a spatula to ensure total contact with the hot surface.
-
Step 5: The Clean Flip. Once the bottom is deeply golden and blistered, carefully flip and cook the other side until matching in color.
Elevating the Experience: The Dipping Sauce Ecosystem
A world-class quesadilla demands a dipping sauce that acts as a bright, acidic, or creamy counterweight to the rich, savory filling. Ditch the generic bottled salsa and try one of these pairings:
-
Charred Jalapeño-Cilantro Crema: Sour cream or Mexican crema blended with roasted jalapeños, fresh lime juice, garlic, and a heavy handful of cilantro.
-
Spicy Chipotle-Honey Glaze: A drizzle or dip made from adobo sauce, a touch of honey, mayonnaise, and apple cider vinegar for a sweet-and-smoky kick.
-
Salsa Verde Cruda: Raw tomatillos, garlic, onion, and cilantro blitzed fresh with lime juice for a sharp, zesty zip that cuts straight through the melted cheese.
Comparative Analysis: Cooking Methods Explored
How does the stovetop pan-grill method stack up against other ways of cooking quesadillas? Let’s break it down.
Common Pitfalls and How to Fix Them
-
The Soggy Center Mistake:
-
The Cause: Too much liquid in the meat mixture or too many wet vegetables (like fresh un-drained tomatoes).
-
The Fix: Simmer fillings until dry and pat dry any wet ingredients before layering.
-
-
The Burnt Outside / Solid Cheese Inside Mistake:
-
The Cause: Pan is too hot.
-
The Fix: Drop your burner down to medium-low. Give the cheese time to catch up to the exterior cooking speed.
-
-
The Slipping Filling Mistake:
-
The Cause: Piling meat on top of dry tortillas without an adhesive.
-
The Fix: Always sandwich the meat between two layers of cheese. The melted dairy acts as culinary mortar.
-
Expert Insights: The Geometry of the Triangle Cut
Why do we cut quesadillas into triangles rather than squares or halves?
Beyond tradition, it is a matter of ergonomics and thermodynamics. Cutting a round quesadilla into quarters or sixths creates acute angles that are structurally easier to dip into small bowls without breaking. Furthermore, smaller triangular geometry exposes less open edge area, keeping the internal heat trapped slightly longer so the cheese stays molten from the first bite to the last.
When it’s time to serve, stack them offset in a staggered pyramid. This allows steam to escape slightly so the crisp outer crust doesn’t soften from residual condensation before it reaches the table.
Frequently Asked Questions
1. What is the best cheese for a traditional melt? Oaxaca cheese is the gold standard for authentic Mexican quesadillas because of its stringy texture and mild, buttery flavor. If unavailable, a 50/50 blend of low-moisture mozzarella and Monterey Jack is an exceptional substitute.
2. Should I use butter or oil in the pan? Butter provides the absolute best flavor and helps achieve a golden, toasted crust. However, mixing a half-teaspoon of oil with butter raises the smoke point, preventing the butter from burning before the quesadilla turns golden brown.
3. How do I keep quesadillas warm if I’m cooking in batches? Preheat your oven to 200°F (90°C). As you finish each quesadilla in the skillet, transfer it to a wire rack inside a baking sheet in the oven. This keeps them warm and crisp without making them soggy in a steam trap.
4. Can I freeze assembled, uncooked quesadillas? Yes. Assemble them tightly, wrap them individually in parchment paper and foil, and freeze. When ready to eat, you can pan-fry them straight from frozen over low heat, covering the pan with a lid for the first few minutes to ensure the center thaws and melts.
5. What is the secret to preventing the tortilla from burning? Patience and temperature control. Use medium-low heat, wipe out any accumulated burnt crumbs between batches if you are cooking multiple rounds, and use just enough fat to coat the pan lightly.
6. Can I make vegetarian quesadillas with the same crispiness? Absolutely. If using black beans, corn, sautéed peppers, or mushrooms, sauté them ahead of time and press out excess moisture with a paper towel before adding them to the cheese layer.
7. How do I reheat leftover quesadillas without ruining the texture? Never use the microwave, which turns the crust rubbery. Instead, toss them back into a dry skillet over medium-low heat for 2 minutes per side, or pop them into an air fryer at 350°F for 3 to 4 minutes.
8. What kind of meat works best? Finely chopped carne asada, well-drained taco-spiced ground beef, shredded mojo pork, or shredded rotisserie chicken all work wonderfully. Just ensure the pieces are small enough to distribute evenly.
Action Checklist
What to Do:
-
Grating your own block cheese instead of buying pre-shredded bags (pre-shredded cheese contains anti-caking starches that inhibit a smooth melt).
-
Keeping your heat steady at medium-low to guarantee the cheese melts fully before the crust over-browning occurs.
-
Serving immediately with a cold, punchy dipping sauce for textural contrast.
What to Avoid:
-
Drenching the pan in too much oil, which turns the tortilla greasy instead of light and crisp.
-
Overstuffing the quesadilla, which causes the delicious filling to ooze out into the pan during the flip.
A truly great stack of golden, pan-grilled cheesy meat quesadilla triangles is a triumph of textures—crispy on the outside, molten on the inside, and elevated by a bold, zesty dipping sauce. Master the heat, respect the cheese-to-meat ratio, and elevate your weeknight cooking effortlessly.