Finding the Perfect Tapioca Pudding: A Creamy, Nostalgic Dessert Worth Every Spoonful
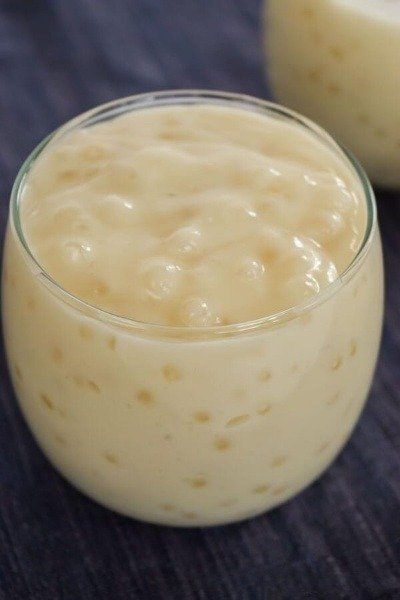
There’s something magical about a bowl of perfectly made tapioca pudding. The moment your spoon glides through the silky custard and scoops up those delicate, pearl-like tapioca beads, you know you’re about to experience pure comfort. The gentle sweetness, the creamy texture, and the subtle vanilla aroma create a dessert that feels like a warm hug from the past.
I still remember the first time I tasted homemade tapioca pudding. It wasn’t served in a fancy restaurant or dressed up with elaborate toppings. It came from my grandmother’s kitchen, where a saucepan quietly simmered on the stove while the scent of vanilla drifted through the house. The tiny pearls transformed into little pockets of softness, floating in a rich custard that seemed almost magical.
But here’s the thing: not all tapioca pudding is created equal.
Some versions turn out too thick. Others become watery, grainy, or overly sweet. Finding that perfect balance—the creamy consistency, the tender pearls, and the just-right sweetness—can feel like a challenge. Fortunately, once you understand a few simple techniques, creating the perfect tapioca pudding becomes surprisingly easy.
Today, I’m sharing everything you need to know to make a foolproof tapioca pudding that tastes better than anything store-bought. Whether you’re making it for a cozy family dessert, a Ramadan gathering, a holiday celebration, or simply because you’re craving comfort food, this recipe delivers every single time.
💛 Why You’ll Love This Recipe
This isn’t just another dessert recipe. It’s the kind of recipe you’ll return to again and again.
Here’s why:
- ✅ Quick and easy to prepare
- ✅ Uses affordable pantry ingredients
- ✅ Beginner-friendly and forgiving
- ✅ Rich, creamy, and incredibly satisfying
- ✅ Perfect for family dinners and holiday gatherings
- ✅ Great make-ahead dessert
- ✅ Naturally gluten-free
- ✅ Comfort food packed with nostalgic charm
- ✅ Easily customizable with different flavors
- ✅ Delicious served warm or chilled
Did You Know?
Tapioca comes from cassava root, a naturally gluten-free starch enjoyed in desserts around the world for centuries.
🧾 Ingredients
For 6 Servings
| Ingredient | Grams | Cups/Spoons | Ounces |
|---|---|---|---|
| Small pearl tapioca | 80g | ½ cup | 2.8 oz |
| Whole milk | 720g | 3 cups | 24 oz |
| Heavy cream | 120g | ½ cup | 4 oz |
| Granulated sugar | 100g | ½ cup | 3.5 oz |
| Large eggs | 2 eggs | — | — |
| Vanilla extract | 10ml | 2 tsp | 0.3 oz |
| Salt | 1g | ¼ tsp | — |
Optional Ingredients
- ½ tsp cinnamon
- Fresh berries
- Whipped cream
- Toasted coconut flakes
- Nutmeg
- Caramel drizzle
Ingredient Notes
Small Pearl Tapioca
The star ingredient. It creates the signature texture that makes tapioca pudding unique.
Substitution: Instant tapioca can be used, but cooking times will vary.
Whole Milk
Provides creaminess and body.
Substitution: 2% milk works, though the pudding will be slightly lighter.
Heavy Cream
Adds luxurious richness.
Optional: Replace with additional milk for a lighter dessert.
Eggs
Create a silky custard texture.
Vanilla Extract
Brings warmth and depth to the flavor.
Pro Tip: Pure vanilla extract gives the best results.
🥗 Nutritional Information (Per Serving)
Approximate values:
| Nutrient | Amount |
|---|---|
| Calories | 255 |
| Protein | 6g |
| Carbohydrates | 36g |
| Fat | 10g |
| Fiber | 1g |
| Sugar | 20g |
Key Vitamins & Minerals
- Calcium
- Vitamin D
- Vitamin A
- Phosphorus
- Potassium
Dietary Information
- Gluten-Free ✔️
- Vegetarian ✔️
- Keto ❌
- Vegan ❌
- Dairy-Free ❌ (unless substitutions are used)
Weight-Loss Friendly?
Moderately. While delicious, this dessert contains sugar and dairy, making it more of an occasional treat than an everyday weight-loss food.
🍳 Kitchen Tools Needed
Essential Tools
- Medium saucepan
- Mixing bowl
- Whisk
- Measuring cups
- Measuring spoons
- Wooden spoon
Optional Upgrades
- Digital kitchen scale
- Fine mesh strainer
- Silicone spatula
- Instant-read thermometer
No Whisk?
Use a fork and mix vigorously.
No Kitchen Scale?
Cup measurements provided above work perfectly.
👩🍳 Step-by-Step Instructions
Step 1: Soak the Tapioca
Time: 30 minutes
Place the tapioca pearls in a bowl and cover with water.
Allow them to soak for 30 minutes.
Visual Cue
The pearls should appear slightly swollen but still firm.
Pro Tip
This step helps ensure even cooking and prevents hard centers.
Step 2: Heat the Milk Mixture
Time: 5 minutes
In a medium saucepan, combine:
- Milk
- Heavy cream
- Sugar
- Salt
Heat over medium heat.
Stir occasionally until the sugar dissolves completely.
What Should NOT Happen
Do not allow the mixture to boil vigorously.
Excessive heat can scorch the milk and affect flavor.
Step 3: Add the Tapioca
Drain the soaked pearls and add them to the warm milk mixture.
Reduce heat to medium-low.
Cook for 20–25 minutes.
Stir frequently.
Visual Cue
The pearls gradually become translucent.
The mixture begins to thicken slightly.
Aroma Check
You should notice a sweet, creamy fragrance.
Step 4: Prepare the Egg Mixture
While the tapioca cooks, whisk the eggs in a bowl until smooth.
Pro Tip
Room-temperature eggs blend more easily.
Step 5: Temper the Eggs
This step prevents scrambled eggs.
Slowly add about ½ cup of the hot milk mixture into the eggs while whisking continuously.
Repeat once more.
What Should NOT Happen
Never pour cold eggs directly into hot pudding.
This can cause curdling.
Step 6: Create the Custard
Slowly pour the tempered egg mixture back into the saucepan.
Cook over low heat.
Stir constantly for 5–7 minutes.
Visual Cue
The pudding becomes noticeably thicker.
It should coat the back of a spoon.
Pro Tip
Patience is key. Low heat creates silky custard.
Step 7: Add Vanilla
Remove from heat.
Stir in vanilla extract.
Mix thoroughly.
Aroma Check
The vanilla scent should immediately bloom and fill the kitchen.
Step 8: Cool and Serve
Serve warm or transfer to serving bowls.
For chilled pudding:
- Cover with plastic wrap touching the surface
- Refrigerate for 2–4 hours
This prevents a skin from forming.
👨🍳 Chef-Level Tips & Mistakes to Avoid
Common Mistake #1: Overcooking
Overcooked tapioca becomes gummy.
Fix
Add a splash of warm milk and stir gently.
Common Mistake #2: Undercooked Pearls
Hard centers ruin the texture.
Fix
Cook for an additional 5–10 minutes on low heat.
Common Mistake #3: Scrambled Eggs
Usually caused by skipping the tempering step.
Fix
Strain the pudding through a fine mesh sieve.
Pro Flavor Hacks
Add Vanilla Bean
Use half a vanilla bean for bakery-quality flavor.
Brown Sugar Upgrade
Replace half the sugar with brown sugar.
Cinnamon Touch
A pinch of cinnamon adds warmth without overpowering.
Restaurant Secret
Stir in 1 tablespoon butter at the end for extra silkiness.
🌶️ Variations & Customizations
Spiced Version
Add:
- ½ tsp cinnamon
- ¼ tsp nutmeg
- Pinch cloves
Perfect for fall and winter.
Healthy Version
Use:
- Low-fat milk
- Reduced sugar
- Unsweetened almond milk
Cuts calories while maintaining flavor.
Kids-Friendly Version
Mix in:
- Mini chocolate chips
- Banana slices
- Strawberry puree
Kids love the fun textures.
Restaurant-Style Version
Top with:
- Whipped cream
- Vanilla bean paste
- Fresh berries
- Caramel drizzle
Looks elegant and impressive.
Fusion Twist
Mango Tapioca Pudding
Blend fresh mango puree into chilled pudding.
Coconut Tapioca Pudding
Replace half the milk with coconut milk.
Matcha Tapioca Pudding
Whisk in 1 teaspoon matcha powder.
🧊 Storage & Reheating Guide
Refrigerator
Store in airtight containers.
Shelf life:
3–4 days
Keep refrigerated at all times.
Freezer
Freeze for up to:
1 month
Important Note
Texture may become slightly grainy after thawing.
Reheating Methods
Microwave
Heat in 30-second intervals.
Stir between each interval.
Stovetop
Place in saucepan.
Add a splash of milk.
Heat gently over low heat.
Oven
Not recommended for small portions.
Maintaining Texture
Always add a little milk before reheating.
This restores creaminess and prevents thickening.
🍽️ Serving Suggestions
Tapioca pudding shines on its own, but a few additions make it unforgettable.
Best Garnishes
- Fresh berries
- Cinnamon dusting
- Whipped cream
- Toasted coconut
- Caramel sauce
- Chocolate shavings
Best Drink Pairings
Hot Drinks
- Coffee
- Chai tea
- Earl Grey tea
Cold Drinks
- Iced coffee
- Vanilla milkshake
- Fresh fruit smoothies
Perfect Side Dishes
- Butter cookies
- Biscotti
- Shortbread
- Fresh fruit salad
Plating Tips
Serve in clear glass dessert cups.
Layer with berries for visual contrast.
Finish with a light dusting of cinnamon.
The creamy white pudding against colorful fruit creates a beautiful presentation worthy of any food blog or dinner party.
❓ Frequently Asked Questions
1. Why is my tapioca pudding too thick?
Tapioca continues absorbing liquid as it cools. Stir in additional milk until the desired consistency is reached.
2. Can I make tapioca pudding ahead of time?
Absolutely. In fact, many people prefer it chilled after several hours in the refrigerator.
3. Is tapioca pudding gluten-free?
Yes. Tapioca comes from cassava root and is naturally gluten-free.
4. Can I use instant tapioca?
Yes, but cooking times differ significantly. Follow package instructions for best results.
5. How do I know when tapioca pearls are fully cooked?
They should appear mostly translucent with no hard white center.
6. Can I make it dairy-free?
Yes. Use coconut milk, almond milk, or oat milk instead of dairy products.
7. Why did my pudding become lumpy?
Usually from overheating the eggs or insufficient stirring during cooking.
Final Thoughts
There’s a reason tapioca pudding has remained a beloved dessert for generations. It isn’t flashy or complicated. Instead, it offers something even better—comfort, nostalgia, and simple satisfaction in every spoonful.
The perfect tapioca pudding is creamy without being heavy, sweet without being overwhelming, and rich enough to feel special while remaining wonderfully simple. Once you master this recipe, you’ll have a timeless dessert that’s perfect for family gatherings, quiet evenings, holidays, and those moments when only a comforting homemade treat will do.
So grab your saucepan, gather your ingredients, and give this recipe a try. When you do, come back and share your experience in the comments. Did you add your own twist? Did your family love it? I’d love to hear your story.
And if you enjoyed this recipe, don’t forget to share it on social media and save it for later. Happy cooking—and may every spoonful bring a little extra comfort to your day.