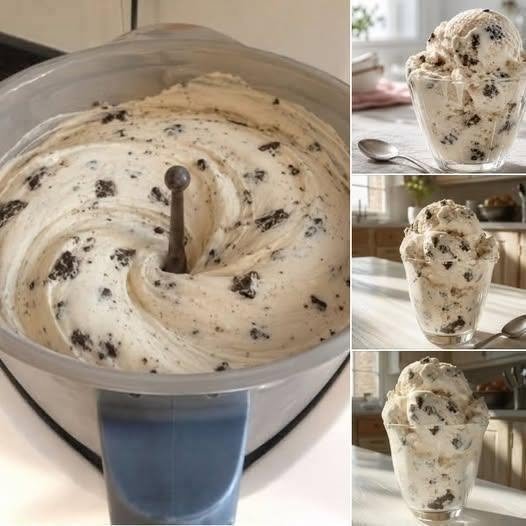
Homemade Cookies & Cream Ice Cream
There is something almost impossible to resist about cookies and cream ice cream.
Maybe it is the first crack of a chocolate cookie between your teeth. Maybe it is that cold, creamy vanilla ice cream melting around the crunchy crumbs. Or maybe it is simply the childhood feeling that comes with opening the freezer and discovering a tub of your favorite ice cream waiting inside.
Whatever the reason, homemade Cookies & Cream ice cream has a special kind of magic.
And the best part? You do not need an expensive ice cream machine to make it.
This easy no-churn recipe creates a rich, creamy ice cream using just a handful of simple ingredients. Sweetened condensed milk gives it a smooth, luxurious texture, whipped cream adds plenty of air and richness, and crushed chocolate sandwich cookies bring that unmistakable cookies-and-cream flavor.
The result is cold, creamy, crunchy, and completely addictive.
You can make it for a summer gathering, a family movie night, a birthday party, or simply because you have a package of cookies sitting in the cupboard.
Once you see how easy it is, you may never feel the need to buy a tub from the store again.
Meta description: Make creamy homemade Cookies & Cream ice cream without an ice cream maker. This easy no-churn recipe uses chocolate sandwich cookies, whipped cream, and condensed milk.
Why You’ll Love This Homemade Cookies & Cream Ice Cream
- No ice cream maker needed: All you need is a freezer and a few basic kitchen tools.
- Easy to make: The preparation takes around 15 minutes.
- Creamy and rich: Whipped cream creates a soft, scoopable texture.
- Loaded with cookies: Every spoonful has crunchy chocolate cookie pieces.
- Beginner-friendly: No complicated custard or stovetop cooking is required.
- Perfect for summer: Cold, creamy ice cream is hard to beat on a hot day.
- Family-friendly: Kids and adults both love the classic cookies-and-cream combination.
- Make-ahead dessert: Prepare it several hours before serving.
- Easy to customize: Add chocolate chips, fudge sauce, caramel, or extra cookie crumbs.
- Great for parties: Make a large batch and let everyone add their favorite toppings.
- Nostalgic: It tastes like the classic ice cream-shop favorite you grew up loving.
What Makes Homemade Cookies & Cream Ice Cream So Good?
The secret is texture.
You want the ice cream base to be rich enough that it stays creamy after freezing, but light enough that you can scoop it without fighting with a frozen block.
Sweetened condensed milk helps because it contains relatively little water compared with regular milk. That means fewer large ice crystals form as the mixture freezes.
Whipped heavy cream adds air and gives the ice cream a soft, luxurious mouthfeel.
Then come the cookies.
Some are crushed into fine crumbs so their chocolate flavor spreads through the ice cream. Others are broken into larger pieces so you get those satisfying crunchy bites.
That combination makes every spoonful slightly different.
Ingredients
This recipe makes approximately 8 servings.
For the Ice Cream
- 480 ml (2 cups) cold heavy whipping cream
- 1 can (14 oz / 397 g) sweetened condensed milk
- 1 teaspoon pure vanilla extract
- ¼ teaspoon fine salt
- 18–20 chocolate sandwich cookies, approximately 180–200 g (6–7 oz)
Optional Toppings
- 4–5 extra chocolate sandwich cookies
- Chocolate sauce
- Mini chocolate chips
- Whipped cream
- Chocolate shavings
- Crushed cookies
- Caramel sauce
Ingredient Notes
Heavy cream: Use cold heavy whipping cream with around 35% fat. The higher fat content helps create a creamy, stable ice cream.
Sweetened condensed milk: Use sweetened condensed milk, not evaporated milk. They are completely different products.
Vanilla: Vanilla adds warmth and balances the sweetness.
Salt: A tiny amount of salt makes the chocolate and vanilla flavors taste richer.
Chocolate sandwich cookies: Use your favorite brand. Classic chocolate sandwich cookies work beautifully, but chocolate wafer cookies can also be used.
PRO TIP: Chill your mixing bowl and beaters for about 10–15 minutes before whipping the cream. Cold equipment helps the cream whip faster and hold its shape better.
Nutritional Information
Approximate nutrition per serving, before optional toppings:
- Calories: 430
- Protein: 5 g
- Carbohydrates: 43 g
- Fat: 27 g
- Fiber: 1 g
- Sugar: 32 g
Actual values vary depending on the cookies and brands of cream and condensed milk used.
This is an indulgent dessert rather than a low-calorie or low-sugar recipe.
Is It Gluten-Free?
Not when made with traditional chocolate sandwich cookies.
For a gluten-free version, use certified gluten-free chocolate sandwich cookies.
Is It Dairy-Free?
No. Heavy cream and condensed milk are dairy products.
You can experiment with dairy-free whipping cream and sweetened condensed coconut milk, but the final texture and flavor will be different.
Is It Vegan?
No, not as written.
A vegan version requires suitable plant-based whipping cream, condensed milk, and sandwich cookies.
Is It Keto?
No. Traditional sweetened condensed milk and cookies are high in carbohydrates.
Kitchen Tools Needed
You do not need specialized equipment.
Basic Tools
- Large mixing bowl
- Electric hand mixer or stand mixer
- Rubber spatula
- Measuring spoons
- Food processor or rolling pin
- Freezer-safe loaf pan or container
- Plastic wrap or reusable lid
Optional Tools
- Ice cream scoop
- Cookie scoop
- Digital kitchen scale
- Chilled metal mixing bowl
No food processor? Place the cookies inside a sealed zip-top bag and crush them with a rolling pin.
Do not crush every cookie into a fine powder. A mixture of crumbs and larger pieces gives the ice cream much better texture.
How to Make Homemade Cookies & Cream Ice Cream
1. Prepare the cookies
Take approximately 18–20 chocolate sandwich cookies.
Separate them into two groups.
Crush about half into fine crumbs.
Break the remaining cookies into small chunks.
You want a mixture of textures.
Fine crumbs give the ice cream that cookies-and-cream flavor throughout the base, while larger chunks provide the crunchy bites.
Set them aside.
2. Whip the cream
Pour 480 ml (2 cups) cold heavy cream into a large mixing bowl.
Using an electric mixer, beat on medium speed for approximately 2–4 minutes.
You are looking for medium-stiff peaks.
When you lift the beaters, the cream should hold its shape but still look smooth.
Do not keep beating after this point.
What should NOT happen: If the cream becomes grainy or starts looking like curds, you have whipped it too far and it is beginning to turn into butter.
3. Prepare the condensed milk mixture
In a separate bowl, combine:
- 397 g sweetened condensed milk
- 1 teaspoon vanilla extract
- ¼ teaspoon salt
Stir until smooth.
This takes only about 30 seconds.
4. Combine the mixtures
Add approximately one-third of the whipped cream to the condensed milk mixture.
Gently fold it in.
This lightens the condensed milk mixture and makes it easier to combine with the remaining whipped cream without knocking out too much air.
Add the remaining whipped cream in two additions.
Fold gently with a rubber spatula.
Use slow, sweeping movements from the bottom of the bowl upward.
Do not stir aggressively.
The whipped cream contains tiny air bubbles that help give the finished ice cream its light texture.
5. Fold in the cookies
Add the crushed cookie crumbs and larger cookie pieces.
Reserve a small handful for the top.
Fold gently until the cookies are evenly distributed.
The mixture should look thick, creamy, and packed with chocolate cookie pieces.
PRO TIP: Save some larger cookie chunks for the very end. If every cookie is crushed too finely, you lose that satisfying crunch that makes cookies-and-cream ice cream so good.
6. Transfer to a container
Spoon the mixture into a freezer-safe container.
A 9 x 5-inch (23 x 13 cm) loaf pan works particularly well because it gives you a nice shallow depth for easy scooping.
Smooth the top with a spatula.
Scatter the reserved cookie pieces over the surface.
For an extra cookies-and-cream look, sprinkle a few fine cookie crumbs across the top.
7. Cover properly
Press a piece of plastic wrap gently against the surface of the ice cream.
Then cover the container with its lid if available.
This helps reduce the formation of ice crystals and prevents the ice cream from absorbing freezer odors.
8. Freeze
Place the container in the coldest part of your freezer.
Freeze for at least 6 hours.
For the firmest texture, freeze overnight.
Avoid repeatedly opening the freezer during the first few hours.
The more stable the freezing environment, the better the final texture.
9. Let it soften before scooping
When you are ready to serve, remove the ice cream from the freezer.
Let it sit at room temperature for approximately 5–10 minutes.
Then scoop.
This short resting time makes the ice cream much easier to serve without turning it soft and melty.
Chef-Level Tips and Mistakes to Avoid
Mistake 1: Using warm cream
Warm cream takes longer to whip and may not reach the right volume.
Use it straight from the refrigerator.
Mistake 2: Overwhipping the cream
Stop when you reach medium-stiff peaks.
If the cream becomes grainy, you have gone too far.
Mistake 3: Mixing too aggressively
Gentle folding is important.
You want to keep as much air in the whipped cream as possible.
Mistake 4: Using only cookie crumbs
Fine crumbs give great flavor, but large cookie chunks create the classic cookies-and-cream experience.
Use both.
Mistake 5: Not covering the surface
Ice crystals can form on exposed ice cream.
Press plastic wrap against the surface before freezing.
Mistake 6: Trying to scoop it immediately
Freshly frozen ice cream can be quite firm.
Give it several minutes at room temperature before scooping.
If Your Ice Cream Is Too Hard
Let it sit at room temperature for 10–15 minutes.
If your freezer is particularly cold, this may be necessary every time.
If Your Ice Cream Is Too Soft
Make sure it has frozen for at least 6 hours.
Also check that your freezer is cold enough.
If It Feels Icy
The container may not have been sealed properly, or the ice cream may have partially melted and refrozen.
Keep the container tightly covered and avoid repeated thawing and refreezing.
PRO TIP: For an even richer cookie flavor, crush 2–3 cookies into very fine crumbs and whisk them into the condensed milk mixture before folding in the whipped cream.
Variations and Customizations
Extra-Cookie Cookies & Cream
Love cookies?
Add another 6–8 cookies.
Use larger chunks so the ice cream feels seriously loaded.
Chocolate Cookies & Cream
Add 2 tablespoons (30 g) unsweetened cocoa powder to the condensed milk mixture.
The result is a deeper chocolate ice cream with chocolate cookie pieces throughout.
Double Chocolate Version
Add cocoa powder to the base and fold in ½ cup (85 g) mini chocolate chips with the cookies.
This one is unapologetically indulgent.
Mint Cookies & Cream
Add ¼ teaspoon peppermint extract to the condensed milk mixture.
Start small.
Peppermint extract can become overpowering very quickly.
For a festive look, use chocolate sandwich cookies with a mint filling.
Peanut Butter Cookies & Cream
Warm 3 tablespoons (48 g) creamy peanut butter until slightly loose.
Swirl it through the ice cream just before freezing.
Do not completely mix it in.
Visible ribbons make every scoop more exciting.
Caramel Cookies & Cream
Drizzle ¼ cup (60 ml) caramel sauce over the mixture.
Use a knife to create gentle swirls.
Add a pinch of flaky sea salt for a salted caramel twist.
Birthday Cake Cookies & Cream
Add 2 tablespoons colorful sprinkles to the mixture.
Use vanilla-flavored sandwich cookies for a fun birthday dessert.
Strawberry Cookies & Cream
Fold in ½ cup (75 g) finely chopped fresh strawberries.
Pat the berries dry before adding them so you do not introduce too much moisture.
How to Make It More Restaurant-Style
Want your homemade ice cream to look like something from an ice cream shop?
Serve two generous scoops in a chilled bowl.
Add:
- A drizzle of chocolate sauce
- Whipped cream
- Crushed cookies
- A whole cookie standing on top
- A few chocolate shavings
For a party, create an ice cream bar with bowls of:
- Cookie crumbs
- Mini chocolate chips
- Caramel sauce
- Chocolate sauce
- Chopped nuts
- Sprinkles
- Fresh berries
Let everyone build their own sundae.
Storage and Freezing Guide
How Long Does Homemade Ice Cream Last?
For the best flavor and texture, enjoy homemade no-churn ice cream within approximately 2 weeks.
It can remain frozen longer, but the texture may gradually become harder and more icy.
How Should It Be Stored?
Use a shallow, airtight freezer-safe container.
Press plastic wrap or parchment directly against the surface before sealing.
Keep it toward the back of the freezer where the temperature stays more stable.
Can You Refreeze Melted Ice Cream?
It is best not to repeatedly melt and refreeze ice cream.
Once ice cream melts, the water can form larger ice crystals when frozen again, creating a noticeably icier texture.
Take out only what you plan to serve.
Serving Suggestions
Cookies-and-cream ice cream is delicious straight from the scoop, but you can easily turn it into a show-stopping dessert.
Serve It With:
- Warm brownies
- Chocolate cake
- Chocolate chip cookies
- Waffles
- Pancakes
- Fresh strawberries
- Banana slices
- Warm chocolate sauce
- Caramel sauce
- Brownie crumbles
Make a Cookies & Cream Sundae
Place two scoops in a bowl.
Drizzle with chocolate sauce.
Add whipped cream.
Sprinkle over crushed cookies.
Finish with a whole chocolate sandwich cookie.
That is all you need.
Frequently Asked Questions
Can I make Cookies & Cream ice cream without an ice cream maker?
Yes. This recipe is specifically designed as a no-churn ice cream, so you do not need an ice cream machine.
Why is my homemade ice cream icy?
Ice crystals can develop when too much water is present, when the ice cream is not properly covered, or when it partially melts and freezes again. Using a rich base, keeping the container tightly covered, and maintaining a consistently cold freezer helps.
Can I use regular milk instead of heavy cream?
Regular milk does not contain enough fat to create the same creamy texture using this no-churn method. Heavy whipping cream is strongly recommended.
Can I use evaporated milk instead of condensed milk?
No. Evaporated milk is unsweetened and has a different composition. Sweetened condensed milk provides both sweetness and texture in this recipe.
How long does homemade Cookies & Cream ice cream take to freeze?
It needs approximately 6 hours to become properly firm, although freezing it overnight gives the best results.
How do I make the ice cream softer and easier to scoop?
Allow it to sit at room temperature for 5–10 minutes before scooping. Storing it in a shallow container can also make serving easier.
Can I use other cookies?
Absolutely. Chocolate wafers, homemade chocolate cookies, gluten-free sandwich cookies, mint cookies, or chocolate-filled biscuits can all work.
Final Thoughts
There is a reason cookies-and-cream ice cream has remained a favorite for so many years.
It is familiar without being boring.
Creamy without being plain.
Crunchy without being complicated.
And when you make it at home, you get to decide exactly how many cookies go into every scoop.
Maybe you want a little crunch.
Maybe you want the ice cream completely packed with cookies.
Maybe you want chocolate sauce running down the sides and a whole cookie perched on top.
There are no rules here.
The basic recipe is wonderfully simple: cold whipped cream, sweetened condensed milk, vanilla, and plenty of chocolate sandwich cookies.
No ice cream maker.
No complicated custard.
No standing over the stove.
Just mix, fold, freeze, and wait.
That final wait might be the hardest part.
But when you finally open the freezer, take your first scoop, and hear that little crunch of cookie against the spoon, you will know it was worth it.
If you make this homemade Cookies & Cream ice cream, leave a comment and tell me how many cookies you added. Did you keep it classic, make it extra chocolatey, or create your own flavor twist? Share this recipe with another ice cream lover and save it for your next movie night, summer gathering, or sweet craving.
Now grab a spoon, grab the cookies, and make a batch. Your freezer deserves it.