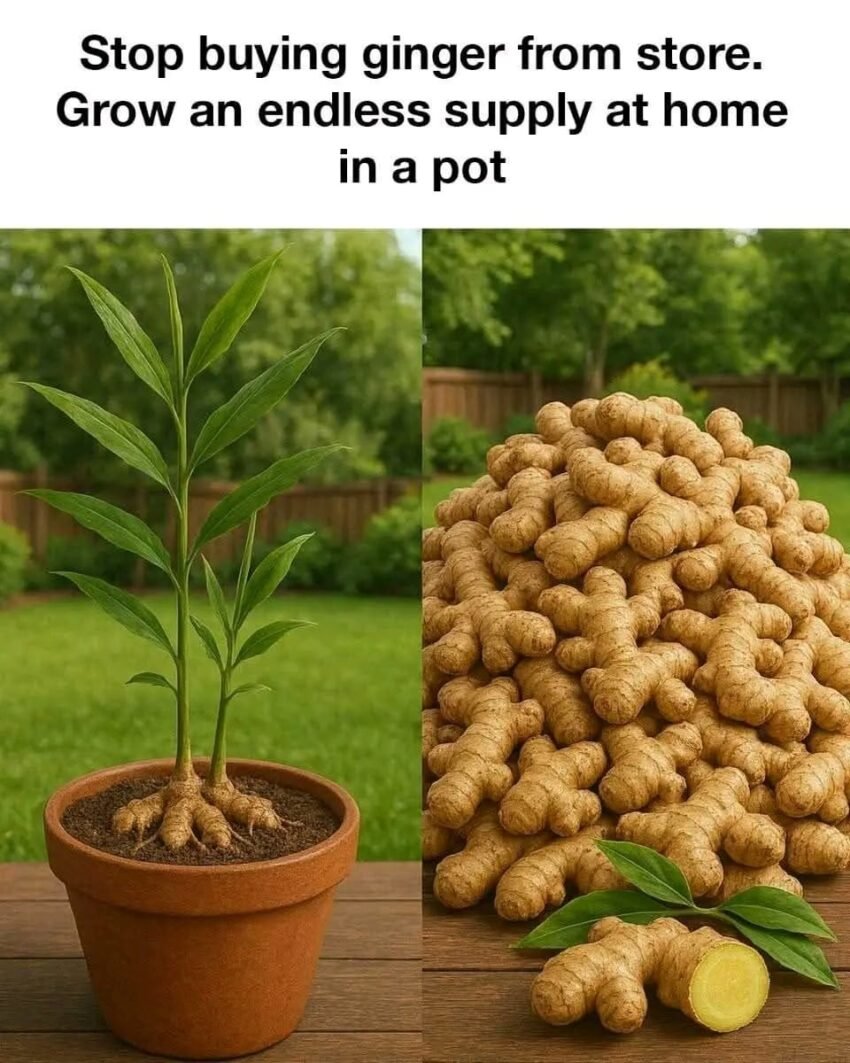
Stop Buying Ginger from the Store — Grow an Endless Supply at Home in a Pot
Learn how to grow ginger at home in a pot and enjoy a continuous harvest. Step-by-step guide, mistakes to avoid, and expert gardening tips.
Stop Buying Ginger from the Store — Grow an Endless Supply at Home in a Pot
Walk into any grocery store and you’ll find it sitting quietly in the produce aisle.
Knobby. Brown. Easy to overlook.
Ginger.
Most people buy it, use a small piece in cooking or tea, and forget about it until the next recipe calls for it again. Then it’s another trip to the store. Another small purchase. Another root that slowly dries out in the fridge.
But here’s something many home gardeners eventually discover — almost like a quiet “why didn’t I do this sooner?” moment:
Ginger doesn’t need to be bought over and over again.
It can be grown at home. In a pot. Even in small spaces like kitchens, balconies, or windowsills.
And once you understand how it grows, the idea of “endless supply” stops sounding like a hack — and starts feeling like basic biology.
Because ginger isn’t a one-time crop.
It’s a plant that keeps giving, if you treat it correctly.
Let’s break down how it actually works, what most people get wrong, and how to grow your own steady supply at home without needing a garden.
First, Let’s Clear Up the “Endless Supply” Idea
The phrase sounds exciting — but it needs realistic framing.
Ginger is not magic. You don’t plant it once and get infinite harvests without effort.
What actually happens is this:
- You plant a piece of ginger root (called a rhizome)
- It grows underground and spreads horizontally
- You harvest small sections while leaving the plant alive
- The remaining part continues growing new shoots
So instead of “one-and-done harvesting,” you get a renewing cycle.
That’s where the “endless supply” idea comes from — not literal infinity, but a continuous regrowth system when managed properly.
And compared to buying small pieces every week or month, it feels almost self-sustaining.
Why Ginger Is Perfect for Home Growing
Ginger (Ginger) is one of the most beginner-friendly plants you can grow indoors because:
- It grows horizontally, not deep
- It thrives in containers
- It doesn’t require full sunlight all day
- It grows slowly but steadily
- It regenerates from its own root system
Unlike vegetables that require pollination or seasonal cycles, ginger focuses its energy underground.
That makes it ideal for:
- apartments
- balconies
- small urban spaces
- indoor gardening setups
You don’t need a farm.
You don’t even need a yard.
Just a pot, soil, and patience.
The Science Behind Ginger’s Growth (Simple Version)
Ginger grows from rhizomes — underground stems that store nutrients and produce new shoots.
Each “knob” on a ginger root is actually a growth node.
When conditions are right:
- those nodes sprout shoots upward
- roots expand downward
- new rhizomes form horizontally
Over time, the plant creates a network under the soil.
That’s why one small piece of ginger can eventually multiply into a much larger plant system.
It’s not cloning.
It’s expansion.
Step-by-Step: How to Grow Ginger in a Pot
Now let’s get practical.
This is where most people either succeed — or quit too early.
Follow this properly and you’ll have a steady home supply.
Step 1: Choosing the Right Ginger
Not all store ginger is equal.
Look for:
- firm texture
- smooth skin
- visible “eyes” or buds
- plump, not shriveled pieces
Avoid:
- dry, cracked ginger
- moldy sections
- overly dehydrated roots
Pro tip:
If possible, buy organic ginger. Some commercial ginger is treated with growth inhibitors that can slow sprouting.
Step 2: Preparing the Rhizome
Before planting:
- Cut ginger into small pieces (1–2 inches each)
- Ensure each piece has at least one growth node
- Let it dry for 24–48 hours
This drying step helps prevent rot when planted.
Step 3: Choosing the Right Pot
This is where people often underestimate the plant.
Ginger grows sideways, so it needs space.
Ideal pot:
- Wide, not deep
- At least 12–14 inches in diameter
- Good drainage holes
If the pot is too small, ginger growth becomes restricted and weak.
Step 4: Soil Preparation
Ginger loves loose, rich, well-draining soil.
Best mix:
- garden soil
- compost
- sand or coco peat
The goal is:
- moisture retention without waterlogging
- airy structure for root expansion
Heavy clay soil is the fastest way to fail.
Step 5: Planting Ginger Correctly
Now the actual planting:
- Place ginger pieces horizontally
- Buds facing upward
- Cover lightly with 1–2 inches of soil
- Water gently
Do not bury it too deep.
Ginger prefers shallow planting.
Step 6: Watering Strategy (Critical Mistake Zone)
Ginger likes moisture — but not drowning.
Best practice:
- keep soil damp, not wet
- water lightly every few days
- avoid standing water in the pot
Overwatering is the #1 reason ginger rots before sprouting.
Step 7: Light and Temperature
Ginger is not a full-sun plant.
It prefers:
- indirect sunlight
- warm environment
- humidity
Ideal temperature range:
- 20°C to 30°C (68°F to 86°F)
If it’s too cold, growth slows dramatically.
Step 8: Waiting for Sprouts
This is where patience matters.
Ginger takes:
- 2 to 4 weeks to sprout
- sometimes longer depending on conditions
At first, nothing seems to happen.
But underground, activity is building.
Many beginners quit here — right before success begins.
Step 9: When and How to Harvest
You don’t need to uproot the entire plant.
That’s the beauty of ginger.
Partial harvesting method:
- wait 3–4 months minimum
- gently dig at the edge of the pot
- cut a small piece of mature rhizome
- cover the remaining plant again
The plant continues growing afterward.
This is what creates the “endless supply” effect.
Mistakes That Kill Ginger Plants
Mistake #1: Overwatering
Roots rot quickly in soggy soil.
Mistake #2: Planting too deep
Ginger struggles to push shoots upward.
Mistake #3: Using poor soil
Compact soil restricts rhizome expansion.
Mistake #4: Too much sun
Direct harsh sunlight can dry leaves and slow growth.
Mistake #5: Harvesting too early
Young plants need time to establish strong root systems.
How to Maximize Your Ginger Yield
If you want consistent production:
1. Use large containers
More space = more rhizome spread.
2. Feed the soil
Add compost every 4–6 weeks.
3. Maintain warmth
Indoor growing works best in colder months.
4. Replant harvested pieces
Every harvested section can become a new plant.
This is how one pot turns into multiple cycles over time.
Pros and Cons of Growing Ginger at Home
Pros:
✔ Continuous supply potential
✔ Saves money over time
✔ Organic and chemical-free
✔ Grows in small spaces
✔ Low maintenance once established
Cons:
✘ Slow initial growth
✘ Sensitive to overwatering
✘ Requires patience
✘ Limited harvest in small pots
✘ Not instant like store purchase
Real-Life Example: What Happens After 6 Months
A typical home grower scenario:
Month 1–2:
- no visible growth
- soil looks unchanged
- roots developing underground
Month 3:
- green shoots appear
- plant begins leaf expansion
Month 4–6:
- visible plant growth
- first small harvest possible
- rhizomes expanding sideways
After 6+ months:
- consistent partial harvesting possible
- plant continues regenerating
At this point, buying ginger starts feeling unnecessary.
Why More People Are Growing Ginger at Home in 2026
Several trends are driving this shift:
- rising grocery prices
- interest in home gardening
- organic food awareness
- small-space urban farming
- sustainability habits
People are realizing something simple:
Even small kitchen ingredients can become self-sustaining with the right setup.
Ginger is one of the easiest entry points into that mindset.
Common Myths About Growing Ginger
Myth #1: Ginger only grows in tropical countries
It grows indoors in almost any climate with warmth.
Myth #2: You need a garden
A pot is enough.
Myth #3: It grows fast
It’s slow but steady — patience is key.
Myth #4: You can only harvest once
You can harvest repeatedly if managed properly.
Frequently Asked Questions
Can I grow ginger from store-bought ginger?
Yes, as long as it’s fresh and has visible growth nodes.
How long does ginger take to grow?
Typically 3–4 months for initial harvest readiness.
Can ginger grow indoors?
Yes, it grows very well indoors with indirect light.
How often should I water ginger?
Keep soil lightly moist, watering every few days depending on climate.
Do I need sunlight for ginger?
Indirect sunlight is best. Avoid harsh direct sun.
Can one ginger plant keep producing?
Yes, if you harvest partially and allow regrowth.
What size pot is best for ginger?
Wide pots at least 12–14 inches in diameter.
Why is my ginger not sprouting?
It may be too cold, too dry, or planted too deep.
Quick Action Checklist
What To Do
✔ Choose fresh ginger with visible buds
✔ Use wide, well-draining pots
✔ Keep soil moist but not soggy
✔ Provide indirect sunlight
✔ Be patient during early growth
✔ Harvest partially, not completely
What To Avoid
✘ Overwatering
✘ Deep planting
✘ Direct harsh sunlight
✘ Harvesting too early
✘ Using compact soil
Conclusion
Growing ginger at home isn’t about shortcuts or hacks.
It’s about understanding how a simple plant actually grows and working with its natural rhythm instead of against it.
Once established, a single pot can provide a steady, renewable supply that reduces store trips and gives you fresher, more controlled ingredients right from your own space.
Not endless in a magical sense — but continuous in a practical, rewarding one.
And sometimes, that’s even better.
👉 If you’ve never tried growing anything before, ginger is one of the easiest places to start. One pot is all it takes to change how you think about everyday ingredients.