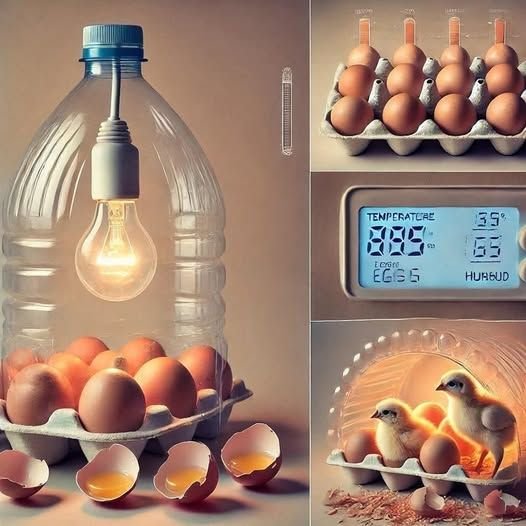
How to Build a Homemade Egg Incubator Using a Water Bottle — Step-by-Step Guide
Learn how to make a simple, low-cost egg incubator using a water bottle. Perfect for hatching eggs at home with minimal materials and maximum success.
Why Build a Homemade Egg Incubator?
Hatching eggs at home can be an exciting and educational experience, whether you’re raising chickens, ducks, or other small poultry. Commercial incubators work well, but they can be expensive and bulky.
A homemade egg incubator using a water bottle is:
-
Affordable
-
Easy to make with everyday items
-
Ideal for small-scale hatching projects
-
Perfect for classrooms, beginners, or backyard enthusiasts
With the right setup, you can provide eggs with the warmth and humidity they need to develop safely.
What You’ll Need
Materials
-
1 clean, empty plastic water bottle (1–2 liters works best)
-
Small heat source (LED light bulb or heating pad)
-
Thermometer
-
Hygrometer (optional, to monitor humidity)
-
Cotton, sponge, or cloth for bedding
-
Small container for water (to maintain humidity)
-
Eggs for incubation
Tools
-
Sharp knife or scissors
-
Tape or glue
-
Marker
Step-by-Step Instructions
Step 1: Prepare the Bottle
-
Wash and dry the bottle thoroughly.
-
Use a knife or scissors to cut a window in the side of the bottle for airflow and observation.
-
Make small holes in the cap for ventilation.
Step 2: Create a Bedding Base
-
Fill the bottom of the bottle with cotton, sponge, or cloth to cushion the eggs and retain some moisture.
-
Ensure the bedding is evenly distributed to avoid tilting the eggs.
Step 3: Add a Water Source for Humidity
-
Place a small container of water inside the bottle, next to the bedding, to maintain steady humidity levels.
-
The humidity helps prevent eggs from drying out, which is crucial for healthy embryo development.
Step 4: Position the Heat Source
-
Place an LED light bulb or small heating pad near the bottle to maintain warmth.
-
Ideal incubation temperature is 99–102°F (37–39°C) for chicken eggs.
-
Use a thermometer to monitor temperature regularly.
Step 5: Place the Eggs
-
Carefully lay the eggs on the bedding, ensuring they are stable and spaced evenly.
-
Mark one side of each egg with a pencil for easy turning later.
Step 6: Turn the Eggs Regularly
-
Eggs must be turned 2–3 times a day to prevent the embryo from sticking to the shell.
-
Always turn them gently and in the same direction.
Step 7: Monitor Temperature and Humidity
-
Keep the incubator in a stable environment, away from drafts and direct sunlight.
-
Adjust the heat source if the temperature rises above or falls below the ideal range.
-
If using a hygrometer, aim for 40–50% humidity for the first 18 days, then increase to 60–65% for hatching.
Step 8: Prepare for Hatching
-
A few days before hatching, stop turning the eggs.
-
Maintain higher humidity to soften the shells and assist chicks in emerging.
-
Expect hatching to occur around 21 days for chicken eggs (time varies by species).
Tips for Success
-
Consistency is key: Fluctuating temperature or humidity can reduce hatch rates.
-
Cleanliness matters: Wash hands before handling eggs to avoid contamination.
-
Observation: Check eggs daily but avoid excessive handling.
-
Patience: Hatching can take hours or even a full day once pipping starts.
Common Mistakes to Avoid
-
Overheating: Can kill embryos
-
Low humidity: Can dry out eggs, preventing hatching
-
Not turning eggs: Causes embryos to stick to shells
-
Using cracked or dirty eggs: Reduces hatch success
Educational Benefits
Homemade egg incubators are perfect for:
-
Learning about biology: Watch the development process from embryo to hatchling
-
STEM projects: Hands-on science experiments for students
-
Backyard poultry enthusiasts: Small-scale hatching without expensive equipment
Building a homemade egg incubator using a water bottle is simple, inexpensive, and effective.
With careful attention to temperature, humidity, and egg turning, you can successfully hatch eggs at home, whether for educational purposes or backyard farming.
It’s a fun, practical project that shows the science of life in action—right from your kitchen or backyard!