Pure bliss.
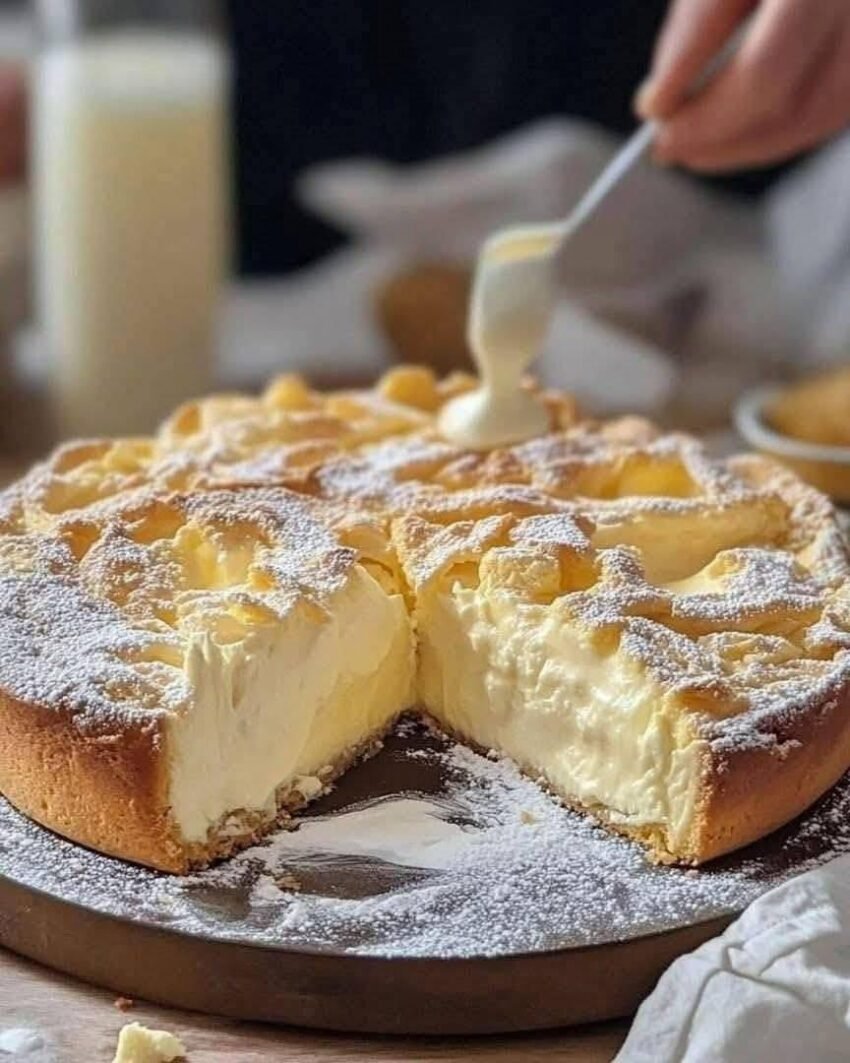
The top is crisp and slightly flaky. The inside? Soft, airy, and filled with a rich vanilla cream that melts on your tongue. It’s comforting, indulgent, and surprisingly simple. And here’s the best part: it looks fancy enough to impress guests, but it’s humble enough to make on a quiet afternoon when you just need something sweet and satisfying.
Let me show you how to make this unforgettable dessert at home.
💛 Why You’ll Love This Recipe
- Quick & easy – No complicated techniques once you understand the basics
- Budget-friendly – Uses simple pantry ingredients
- Beginner-friendly – If you can stir and bake, you can make this
- Indulgent treat – Creamy, buttery, and totally satisfying
- Perfect for occasions – Great for tea time, Eid, family dinners, or celebrations
- Comfort dessert – Feels like homemade love in every bite
- Make-ahead friendly – Tastes even better the next day
🧾 Ingredients (With Exact Measurements + Pro Notes)
For the Choux Pastry Layers
- Water – 250 ml (1 cup)
- Unsalted butter – 125 g (½ cup / 4.4 oz)
Adds richness and flavor - All-purpose flour – 150 g (1 cup / 5.3 oz)
Gives structure - Eggs – 4 large
Creates the airy texture - Salt – ¼ tsp
Balances flavor
For the Vanilla Cream Filling
- Milk – 750 ml (3 cups)
- Sugar – 150 g (¾ cup)
- Egg yolks – 4
Adds richness and color - Cornstarch – 60 g (½ cup)
Thickens the custard - Unsalted butter – 200 g (¾ cup / 7 oz), softened
Makes it silky and smooth - Vanilla extract – 2 tsp
Flavor booster
Optional
- Powdered sugar – for dusting
- Whipped cream – for extra richness
Smart substitutions:
- No cornstarch? Use custard powder
- Dairy-free? Use plant-based milk and butter (texture may vary)
🥗 Nutritional Information (Per Serving)
(Approximate values based on 12 servings)
- Calories: 320 kcal
- Protein: 5 g
- Carbohydrates: 28 g
- Fats: 20 g
- Fiber: 1 g
Key nutrients:
- Calcium (from milk)
- Vitamin A (from butter and eggs)
Diet notes:
- ❌ Not gluten-free
- ❌ Not vegan
- ❌ Not keto
- ⚠️ Not weight-loss friendly (but worth every bite!)
🍳 Kitchen Tools Needed
- Saucepan
- Mixing bowls
- Whisk
- Baking tray (9×13 inch)
- Parchment paper
- Electric mixer (optional but helpful)
No mixer? Use a whisk and some arm power — totally doable!
👩🍳 Step-by-Step Instructions
Step 1: Make the Choux Dough
- In a saucepan, combine water, butter, and salt.
- Heat over medium until butter melts and mixture starts to boil.
Pro tip: Don’t let it boil too long — just until everything is melted.
- Add flour all at once. Stir quickly.
You’ll see it form a thick dough — keep stirring for 2–3 minutes.
What should NOT happen:
❌ Don’t leave lumps of flour
❌ Don’t stop stirring early
Step 2: Add Eggs
- Let the dough cool for 5 minutes.
- Add eggs one at a time, mixing well after each.
At first, it may look separated — keep mixing. It will come together into a smooth, glossy batter.
Step 3: Bake the Layers
- Divide batter into two parts.
- Spread one half onto a lined tray — uneven texture is perfect!
Did you know?
Those uneven ridges create Karpatka’s signature “mountain” look (named after the Carpathian Mountains!).
- Bake at 200°C (390°F) for 25–30 minutes.
Visual cues:
- Golden brown
- Crisp top
- Slightly puffed
Repeat for second layer. Let cool completely.
Step 4: Prepare the Custard Cream
- Heat milk in a saucepan until warm (not boiling).
- In a bowl, whisk egg yolks, sugar, and cornstarch.
- Slowly add warm milk while whisking.
- Return mixture to saucepan. Cook on medium heat.
Stir constantly until thick — about 5–7 minutes.
Pro tip: It should coat the back of a spoon.
- Remove from heat, add vanilla. Cool completely.
Step 5: Make It Silky
- Beat softened butter until fluffy.
- Add cooled custard slowly while mixing.
Result: smooth, creamy filling.
Step 6: Assemble the Cake
- Place one pastry layer at the bottom.
- Spread cream evenly.
- Add second layer on top.
Lightly press down.
Step 7: Chill & Finish
Refrigerate for at least 3–4 hours (overnight is best).
Dust with powdered sugar before serving.
👨🍳 Chef-Level Tips & Mistakes to Avoid
Mistakes:
- Adding eggs to hot dough → scrambled eggs
- Undercooking custard → runny filling
- Not chilling enough → messy slices
Fixes:
- Runny cream? Chill longer or rewhip with butter
- Flat pastry? Oven may be too cool
Flavor hacks:
- Add lemon zest for freshness
- Use real vanilla for bakery-quality taste
🌶️ Variations & Customizations
- Chocolate version: Add cocoa powder to cream
- Healthy version: Reduce sugar slightly
- Kids-friendly: Add chocolate chips
- Restaurant-style: Pipe cream in layers
- Fusion twist: Add coffee flavor or caramel drizzle
🧊 Storage & Reheating Guide
- Fridge: 3–4 days (covered)
- Freezer: Not recommended (cream texture changes)
Best tip: Always serve chilled for best texture
🍽️ Serving Suggestions
- Pair with tea or coffee
- Add fresh berries on top
- Drizzle chocolate sauce
Plating tip:
Cut uneven squares — rustic look is part of the charm!
❓ FAQs
1. Why is my Karpatka soggy?
It wasn’t baked long enough or wasn’t chilled properly.
2. Can I make it ahead?
Yes! It tastes better the next day.
3. Can I use custard powder instead of cornstarch?
Absolutely — works great.
4. Why did my cream split?
Butter or custard was at wrong temperature.
5. Can I make it gluten-free?
You can try gluten-free flour, but texture may change.
6. How do I get perfect layers?
Don’t worry about perfection — rustic is ideal!
7. Can I reduce sugar?
Yes, but it may affect flavor slightly.
Karpatka is one of those desserts that surprises you. It looks simple, even a little rough… but the taste? Absolutely unforgettable.
If you’ve never made a European-style cream cake before, this is your perfect starting point. It’s forgiving, delicious, and deeply satisfying.
Give it a try — and when you do, come back and tell me how it turned out. Did you stick to the classic or try your own twist?
And don’t forget to share your creation with friends or on social media… because desserts this good deserve to be seen (and envied 😉).
Happy baking! 🍰