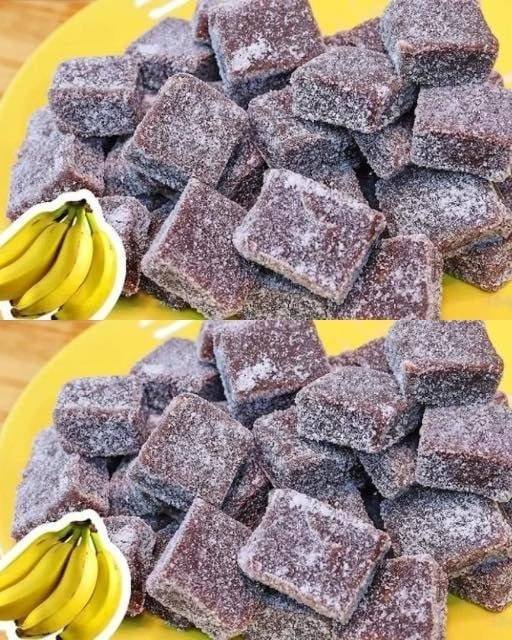
Ripe and Natural Banana Candies are soft, chewy, homemade treats made with real bananas and simple ingredients—no artificial flavors, just naturally sweet, healthy candy perfect for kids, snacks, or guilt-free cravings.
Ripe and Natural Banana Candies – Soft, Chewy, Naturally Sweet Homemade Treats
There’s something quietly magical about ripe bananas.
That moment when their yellow skin starts to speckle with brown spots—it’s like nature is whispering, “I’m at my sweetest now.” The smell becomes richer, the texture softer, and suddenly they’re no longer just fruit… they’re pure, natural candy waiting to happen.
Now imagine turning those overripe bananas into small, chewy, golden bites of sweetness. No artificial flavors. No preservatives. Just real fruit transformed into something that feels like a homemade treasure.
These Ripe and Natural Banana Candies are soft, slightly chewy, naturally sweet, and deeply comforting. They taste like banana bread and candy had a simple, healthy love story—and decided to stay bite-sized.
Perfect for kids, lunchboxes, tea-time snacks, or guilt-free sweet cravings.
💛 Why You’ll Love This Recipe
- Naturally sweet: No refined sugar needed (or minimal use)
- Healthy snack alternative: Made from real fruit
- Kid-friendly: Safe, soft, and delicious
- Simple ingredients: Pantry basics only
- No preservatives: 100% homemade goodness
- Great for ripe bananas: No food waste
- Easy to make: Beginner-friendly recipe
This is the kind of recipe that turns “too ripe to eat” bananas into something you actually look forward to.
🧾 Ingredients (With Exact Measurements + Notes)
Main Ingredients:
- 4 ripe bananas (about 400g / 14 oz)
The riper, the sweeter—brown spots are perfect
Sweetening & Binding:
- 2 tablespoons honey or jaggery syrup (30 ml / 1 oz)
Optional if bananas are very sweet already - 1 tablespoon lemon juice (15 ml)
Prevents browning and balances sweetness
Texture Enhancers:
- 2 tablespoons cornflour (20g / 0.7 oz)
Helps firm up candy texture - 1 tablespoon rice flour or oats powder (10g)
Adds light chewiness
Flavor Add-ons:
- ½ teaspoon cinnamon powder
- ½ teaspoon vanilla extract (optional)
Optional Coating:
- Desiccated coconut
- Powdered sugar
- Cocoa powder
Substitutions:
- Honey → maple syrup or date syrup
- Cornflour → arrowroot powder
- Rice flour → almond flour (slightly nutty taste)
🥗 Nutritional Information (Per Serving – Approx. 12 candies)
- Calories: 65 kcal
- Protein: 1g
- Carbohydrates: 15g
- Fats: 0.5g
- Fiber: 1.5g
Key Nutrients:
- Potassium (heart health)
- Vitamin B6 (energy support)
- Natural sugars (quick energy)
- Fiber (digestion support)
Dietary Notes:
- ✔ Vegan (if honey replaced)
- ✔ Gluten-free
- ✔ Dairy-free
- ✔ Kid-friendly
- ⚖️ Naturally sweet, moderate sugar snack
🍳 Kitchen Tools Needed
Basic tools:
- Blender or fork (for mashing)
- Non-stick pan
- Spatula
- Mixing bowl
Optional tools:
- Silicone molds (for candy shapes)
- Parchment paper
- Air fryer (for drying option)
💡 Tip: A non-stick pan is essential to prevent sticking during cooking.
👩🍳 Step-by-Step Instructions
Step 1: Mash the bananas
Peel ripe bananas and mash them until smooth.
💡 You can use a fork or blender for a silky texture.
Step 2: Cook the mixture
Pour mashed bananas into a non-stick pan over low heat.
Stir continuously for 5–7 minutes until it thickens slightly.
🔥 Aroma cue: sweet banana smell becomes stronger and richer.
Step 3: Add flavor ingredients
Add:
- Lemon juice
- Cinnamon
- Vanilla extract
Stir well to combine.
Step 4: Add binding ingredients
Mix in cornflour and rice flour gradually.
Cook for another 5–8 minutes until mixture becomes thick and sticky.
💡 Pro Tip: It should start pulling away from the pan like dough.
🚫 Don’t rush this step—moisture needs to reduce properly.
Step 5: Shape the candies
Let mixture cool slightly.
Grease your hands lightly and shape into:
- Small balls
- Mini bars
- Or flatten and cut into squares
Step 6: Optional coating
Roll candies in:
- Coconut
- Cocoa powder
- Or powdered sugar
Step 7: Drying (important step)
Let candies air dry for 4–6 hours or until firm.
💡 For quicker drying: place in air fryer at 80°C for 20–25 minutes.
👨🍳 Chef-Level Tips & Mistakes to Avoid
- Always use very ripe bananas for best sweetness
- Cook mixture on low heat to avoid burning
- Stir constantly for smooth texture
- Don’t skip drying step—it firms up candies
- Avoid watery bananas (they won’t set properly)
💡 Pro Hack: Add a pinch of salt to enhance natural sweetness.
🚫 Common mistake: Under-cooking mixture → sticky, soft candies that don’t set.
🌶️ Variations & Customizations
🍫 Chocolate banana candies
Add cocoa powder or dip in melted chocolate.
🥥 Coconut version
Mix coconut into batter for tropical flavor.
🌰 Nutty version
Add crushed almonds or walnuts.
🍯 Extra sweet version
Drizzle honey after shaping.
🍓 Fruit twist
Add dried fruits like raisins or chopped dates.
🍬 Candy bar style
Press mixture into tray and cut into squares after drying.
🧊 Storage & Shelf Life
Room temperature:
Store in airtight container for 2–3 days
Refrigerator:
Lasts up to 1 week
Freezer:
Freeze for up to 1 month
💡 Tip: Keep in cool, dry place to maintain texture.
🍽️ Serving Suggestions
These banana candies are versatile and fun.
Best ways to enjoy:
- Tea-time snack
- Kids’ lunchbox treat
- Healthy dessert alternative
- Post-workout energy bite
- Party sweet platter
Pair with:
- Milk
- Herbal tea
- Coffee
- Smoothies
Garnishing ideas:
- Coconut dusting
- Chocolate drizzle
- Crushed nuts
Plating tip:
Arrange in small paper cups for a candy-shop style presentation.
❓ FAQs
1. Can I skip sugar completely?
Yes, ripe bananas are naturally sweet enough.
2. Why are my banana candies sticky?
They need more cooking or drying time.
3. Can I bake instead of drying?
Yes, bake at low temperature (100–120°C) until firm.
4. Can I use green bananas?
No, only ripe bananas work for sweetness and texture.
5. Are these good for kids?
Yes, they are natural, soft, and free from preservatives.
6. How long do they last?
Up to a week in the fridge if stored properly.
Ripe and Natural Banana Candies are proof that simple ingredients can create something truly special. They’re soft, sweet, and naturally comforting—turning overripe bananas into little bites of joy instead of waste.
It’s the kind of recipe that feels wholesome, nostalgic, and quietly satisfying. No artificial flavors, no complicated steps—just real fruit transformed into homemade candy magic.
Once you try them, you’ll start looking at ripe bananas differently… not as leftovers, but as future treats.
If you make this recipe, share your variations, your favorite coatings, and how you shaped your candies. And don’t forget to pass it on to someone who loves easy, healthy sweets.
Because sometimes… nature already gives us dessert—we just have to make it.